Measurement and analysis software ideal for the manufacturing site in pursuit of usability
Product Description
It’s an in-house developed software which has been used in vaiours industories mainly the auto industry since its development in 1999.
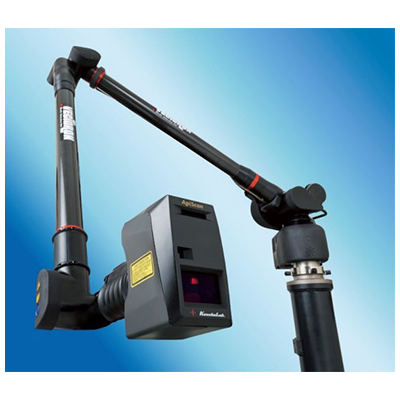
Both contact and non-contact measurement are possible. It needs to be plugged into TTS measurement devices.
It’s possible to compare and analyze the 3D CAD data and measurement work piece to see if it passes or fails at the site.
By eliminating the need for drawings and simplifying the inspection jig, it reduces costs.
It offers User-friendly measurement and analysis software that even beginners can easily operate.
*Compatible with Vectoron and Leica.
Product Features
- Microsoft Office users can use the soft intuitively due to the ribbon interface same as Office.
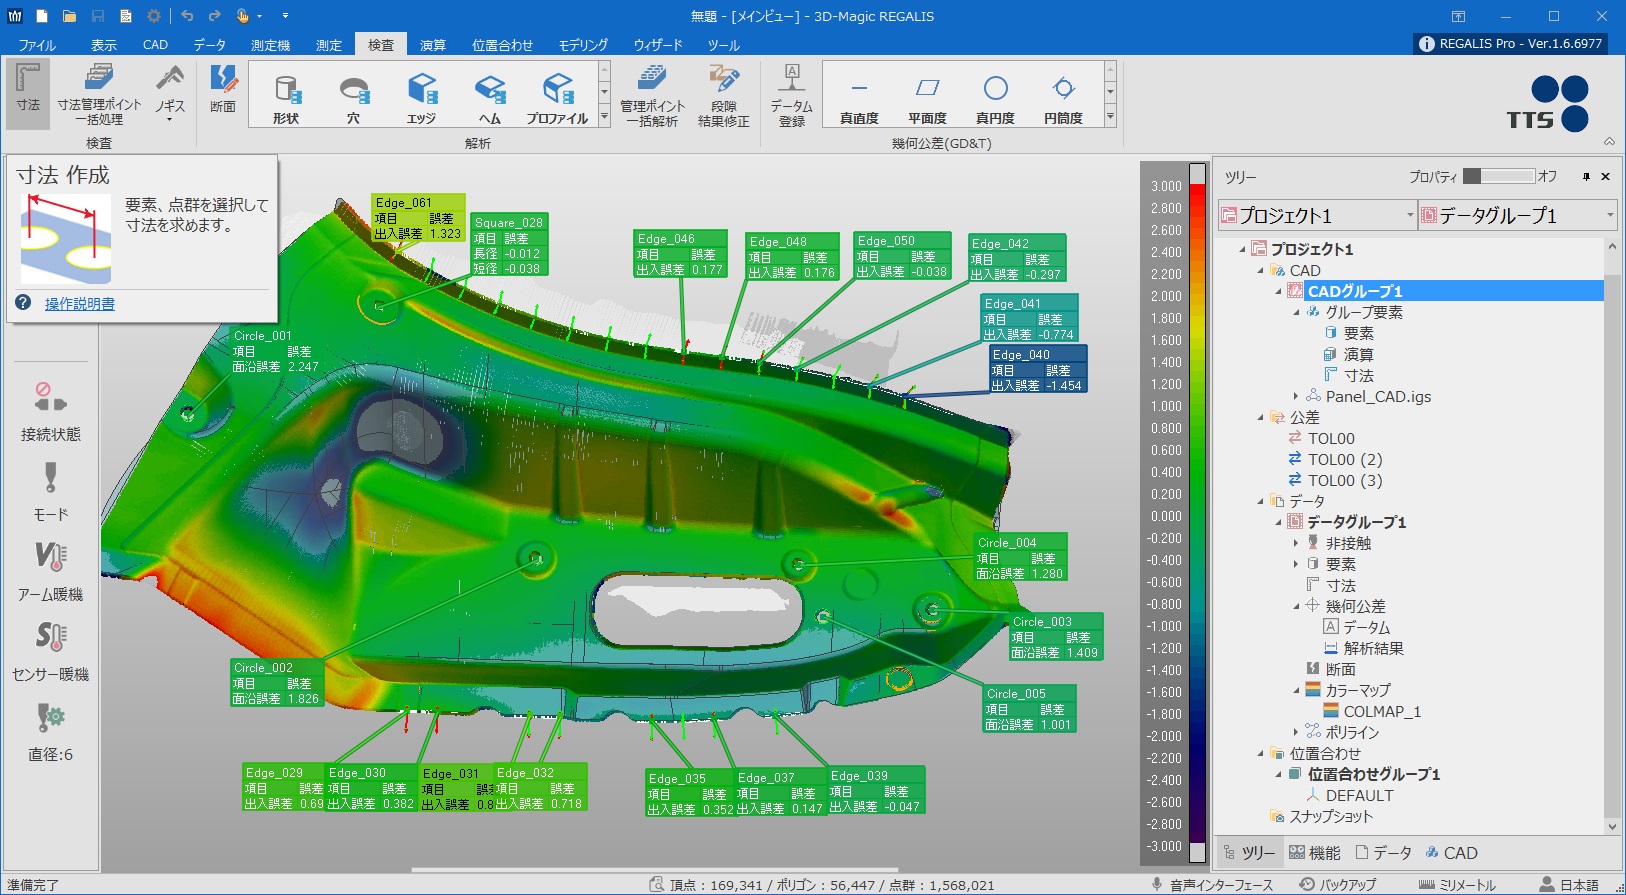
- Simple function guide is displayed on the screen when a pointer is on a button.
- There is no need to search in operation manual as each function has a link to jump to the manual.
- Animation of each operation procedure allows users to check the procedure immediately without jumping to other pages.
- There is no need to search buttons of major functions as buttons of those frequently used functions are installed in the main menu.
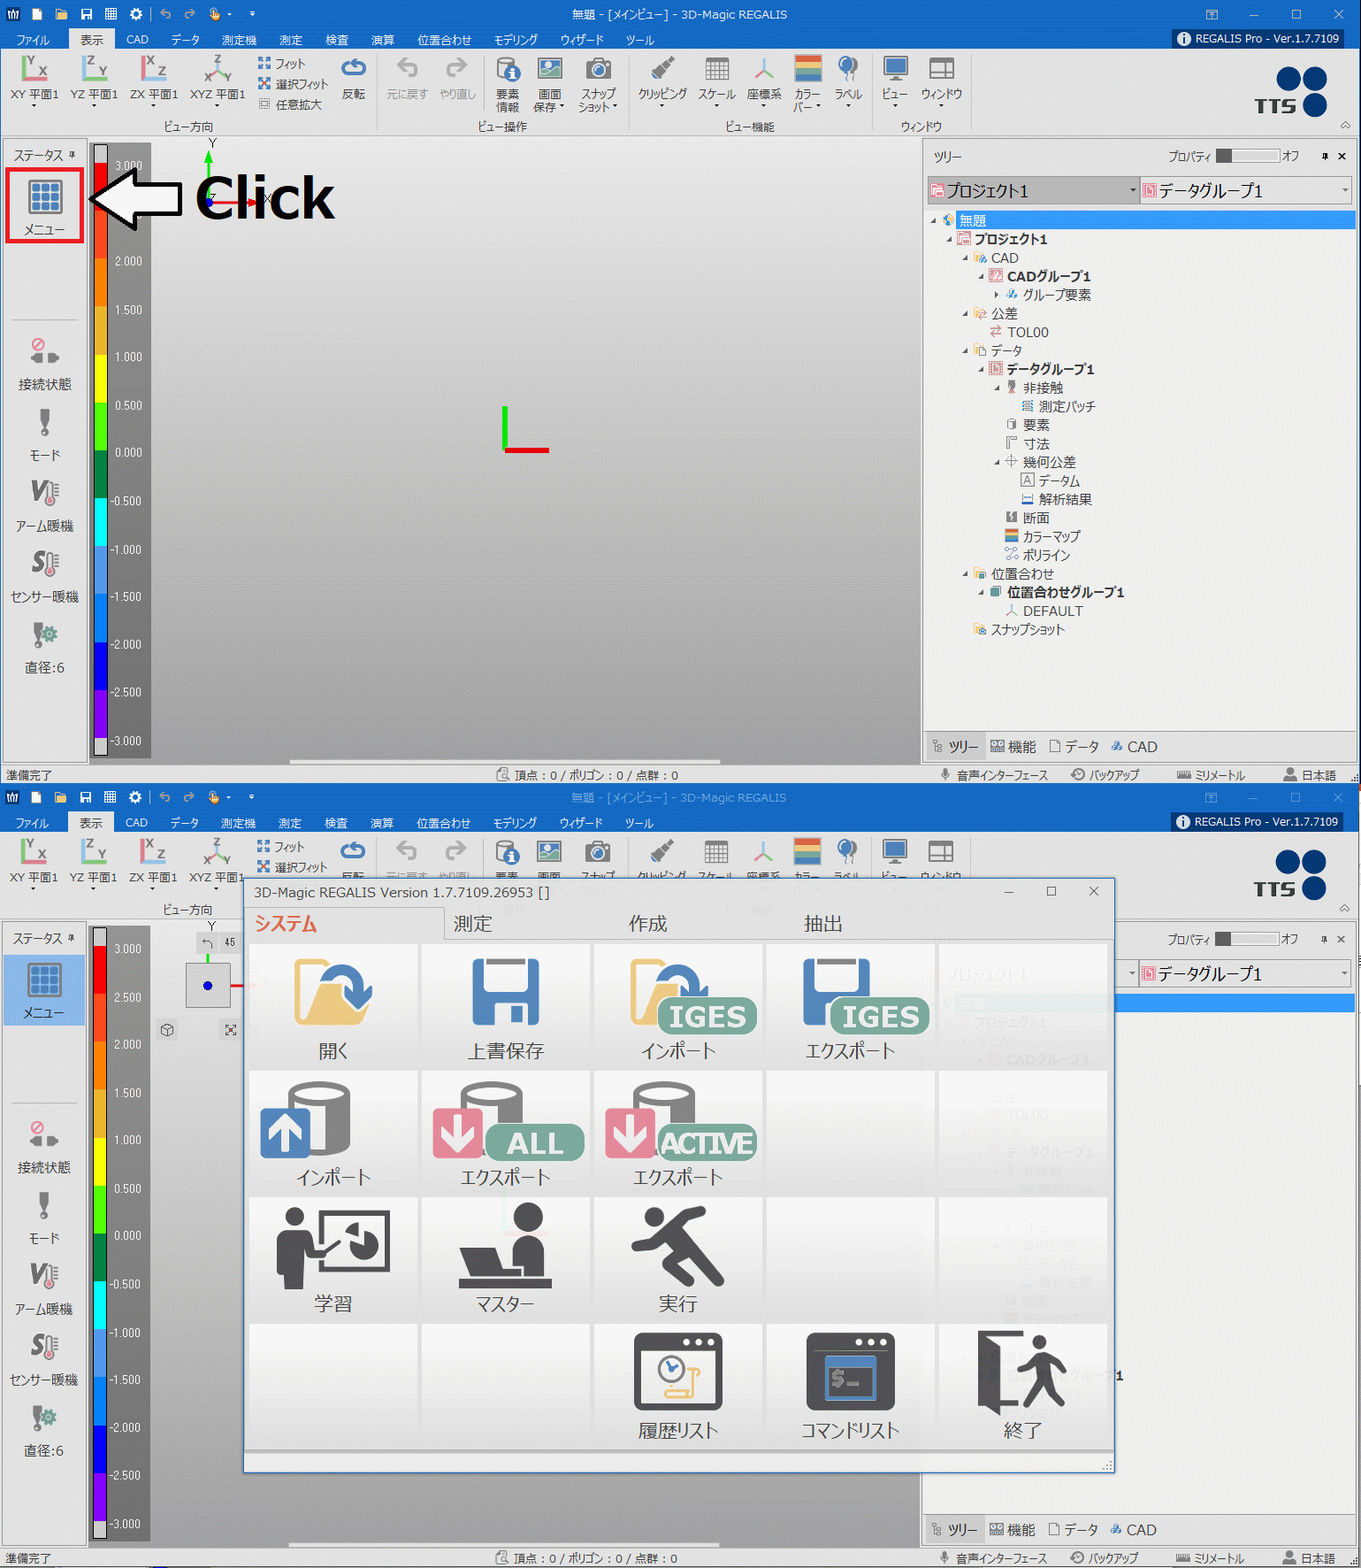
- The button layout can be rearranged depending on the users tasks.
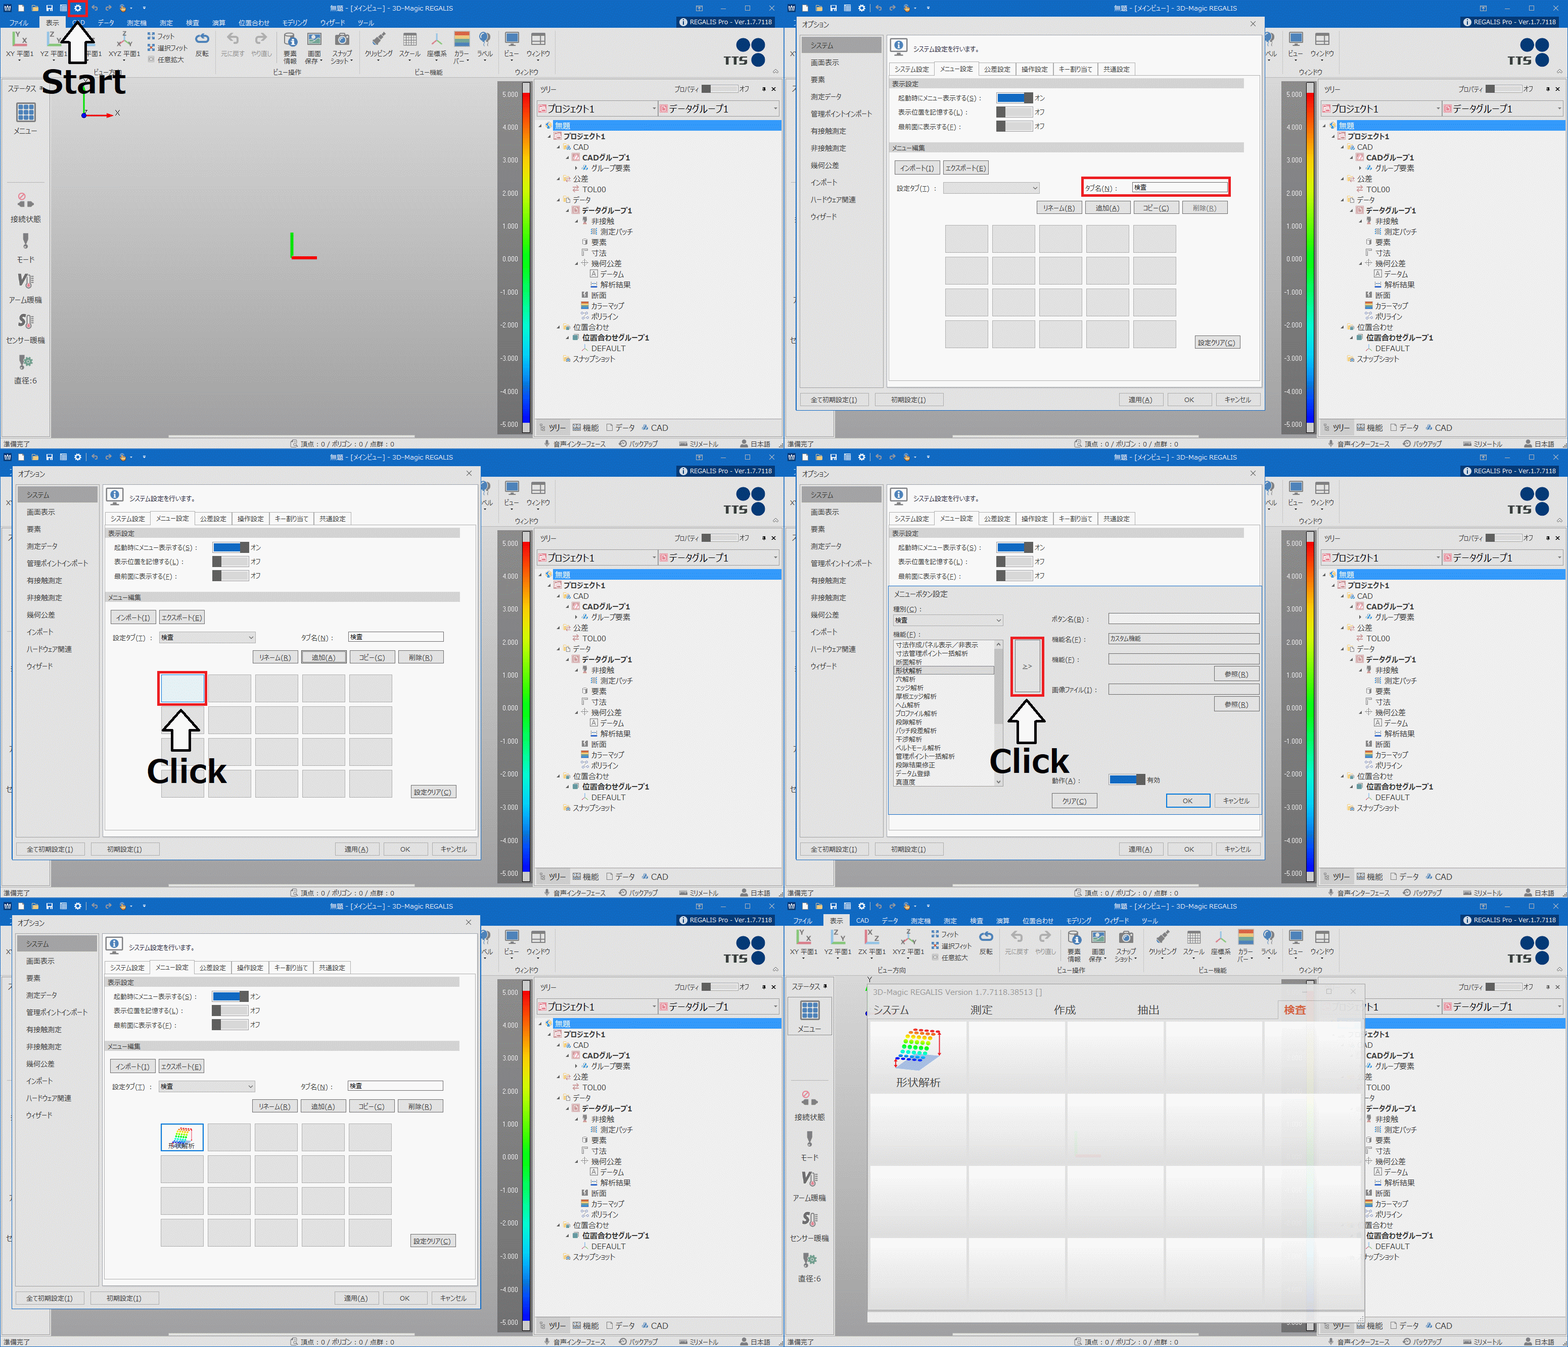
- Layout of the main menu is almost same as the one in the 3D-Magic 2000 that is convenient for regular users even if the screen design changes.
- The software can be operated with an interactive function.
- It can be operated remotely without looking at a monitor and touching a keyboard.
- Multiple projects can be branched under one tree.
- Coordinate system for each project can be held.
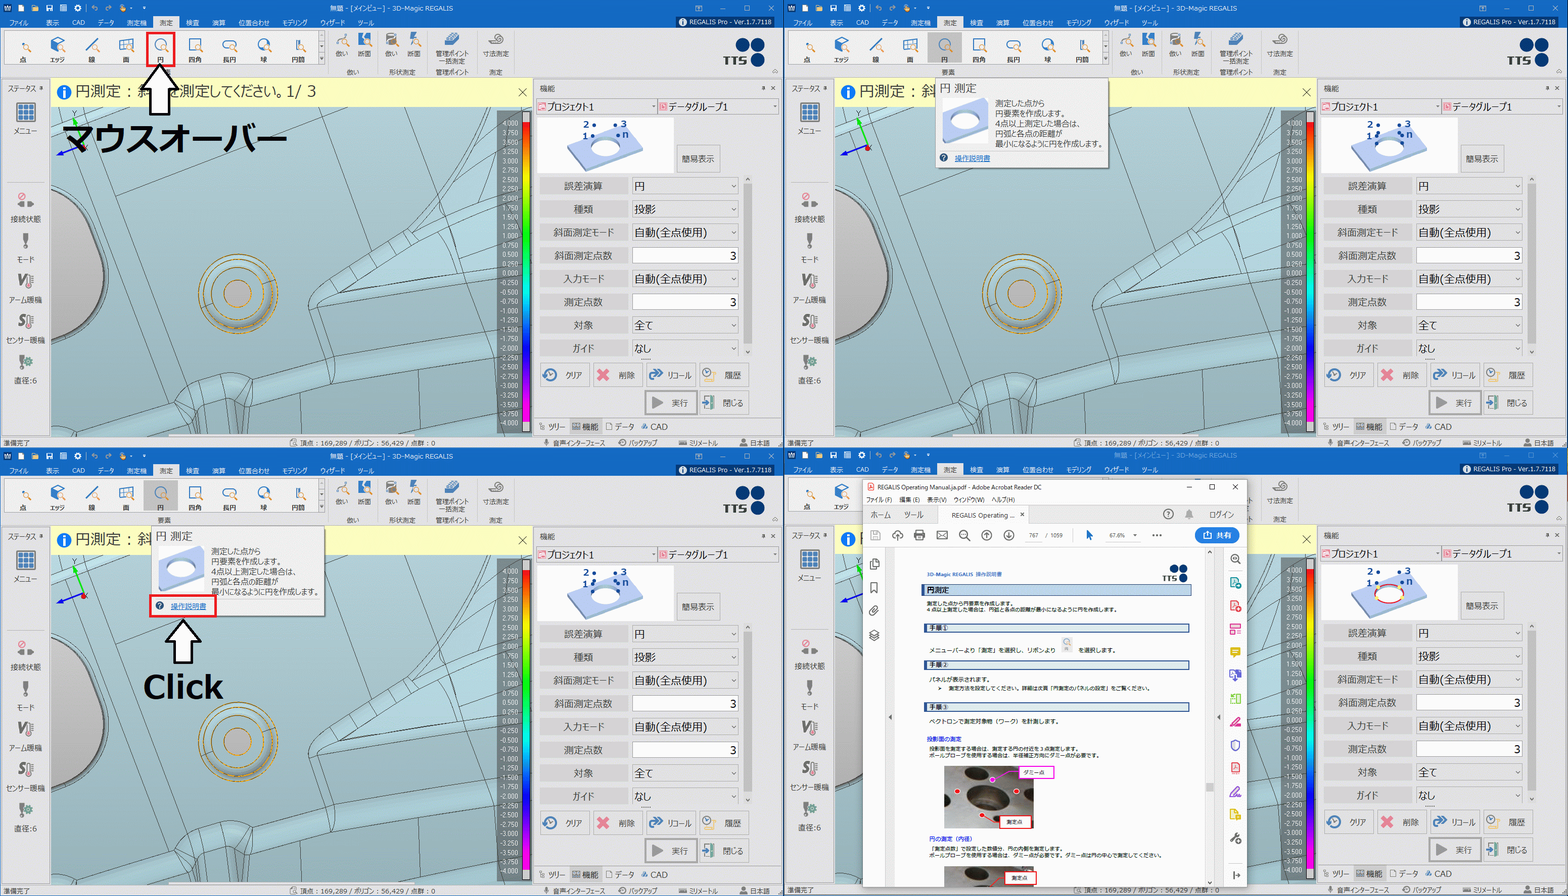
- Difference between CAD and measurement data is displayed at the site.
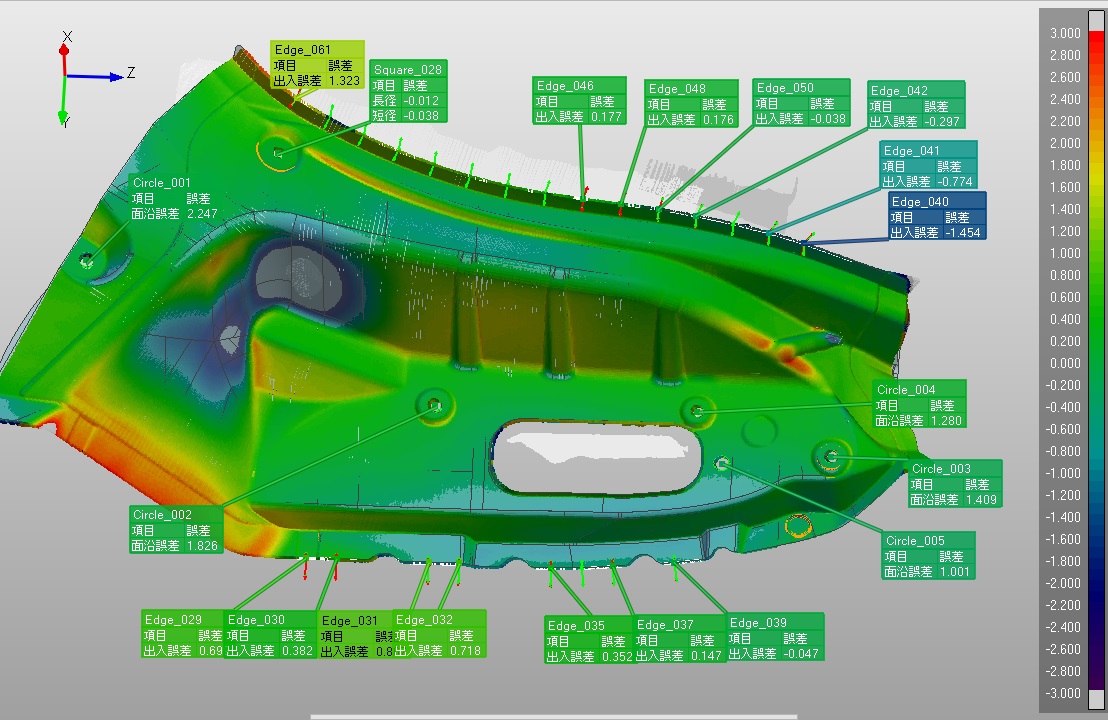
- The analysis result can be shown visually as the amount of change and difference are color mapped as well as the value.
- It is possible to select the most suitable alignment method among various features of the alignment function.
【Surface axis and coordinate origin setting 】
Coordinate system can be created based on a surface plate and inspection jig even without CAD data.
Alignment by selecting imported measurement elements is possible as well as alignment based on measurement of work piece at the manufacturing site.
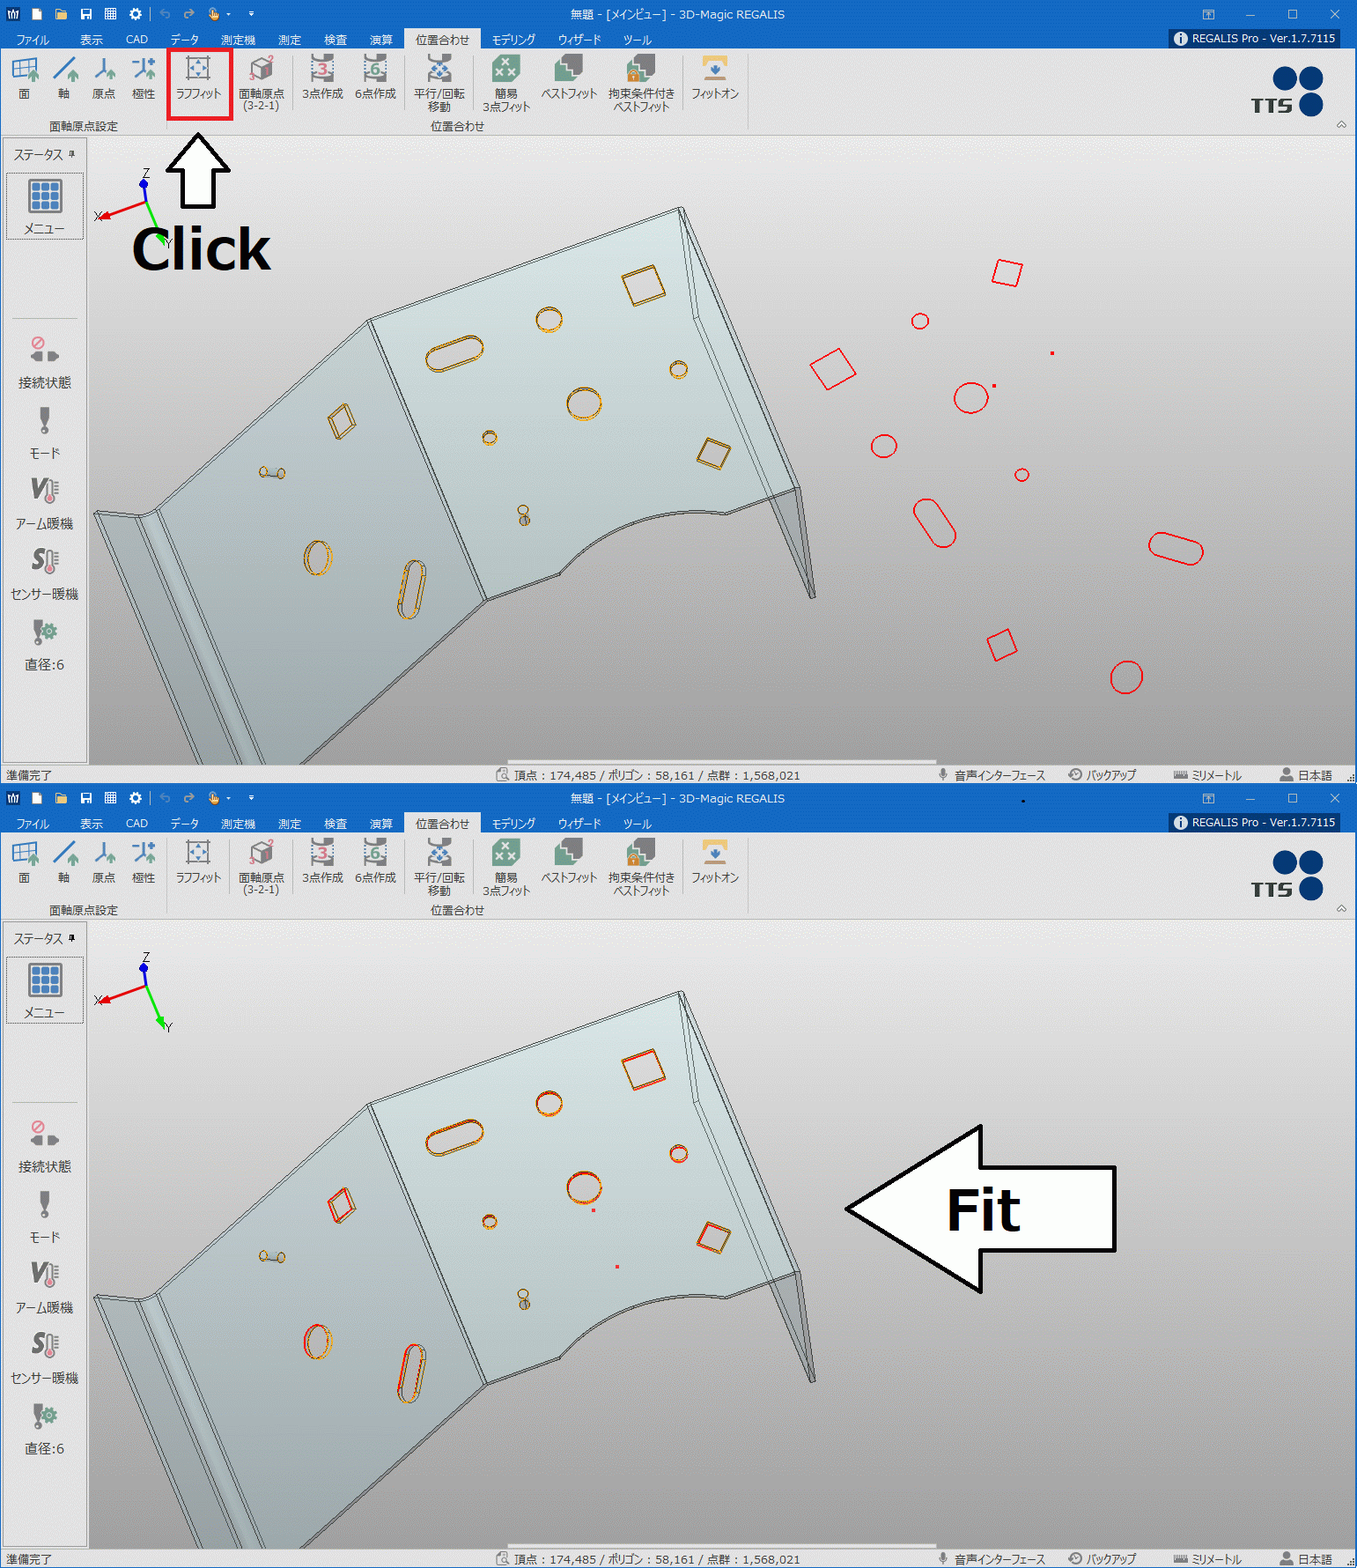
【Rough Fitting】
Auto-alignment which makes the difference between CAD and measurement elements minimum is available just by clicking a button.
【3-point Fitting】
Select the reference side element (CAD) and the measurement side element as constraints at three points, and create a coordinate system by comparing the positions of each element.
Fitting types of CAD and those elements can be selected.
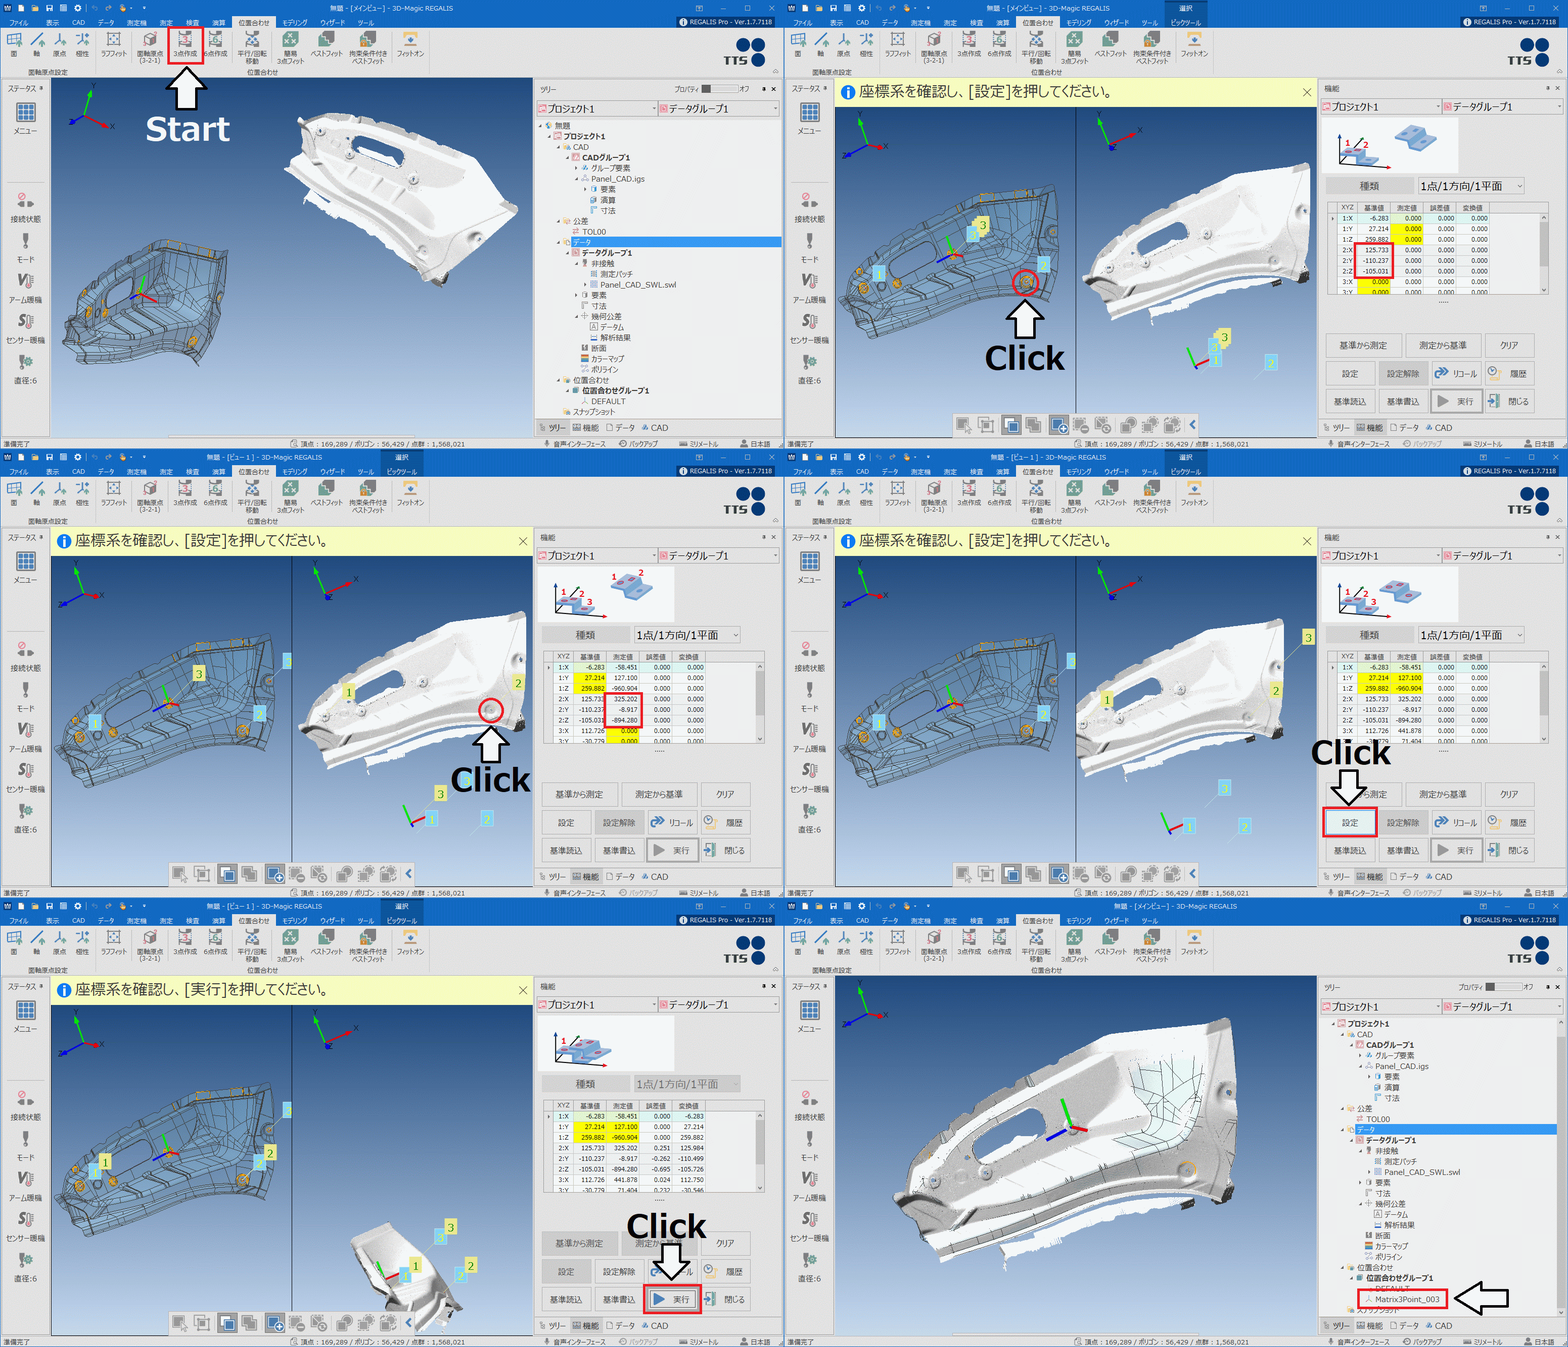
【6-point Fitting】
Align with 6 or more reference elements points(CAD) and 6 measurement points.
Alignment can be performed by arbitrarily selecting the axial direction for each point.
【Parallel/rotational movement】
Create coordinate system by moving the data by entering numerical values.
Alignment is possible by defining rotation coordinates instead of Cartesian coordinates.
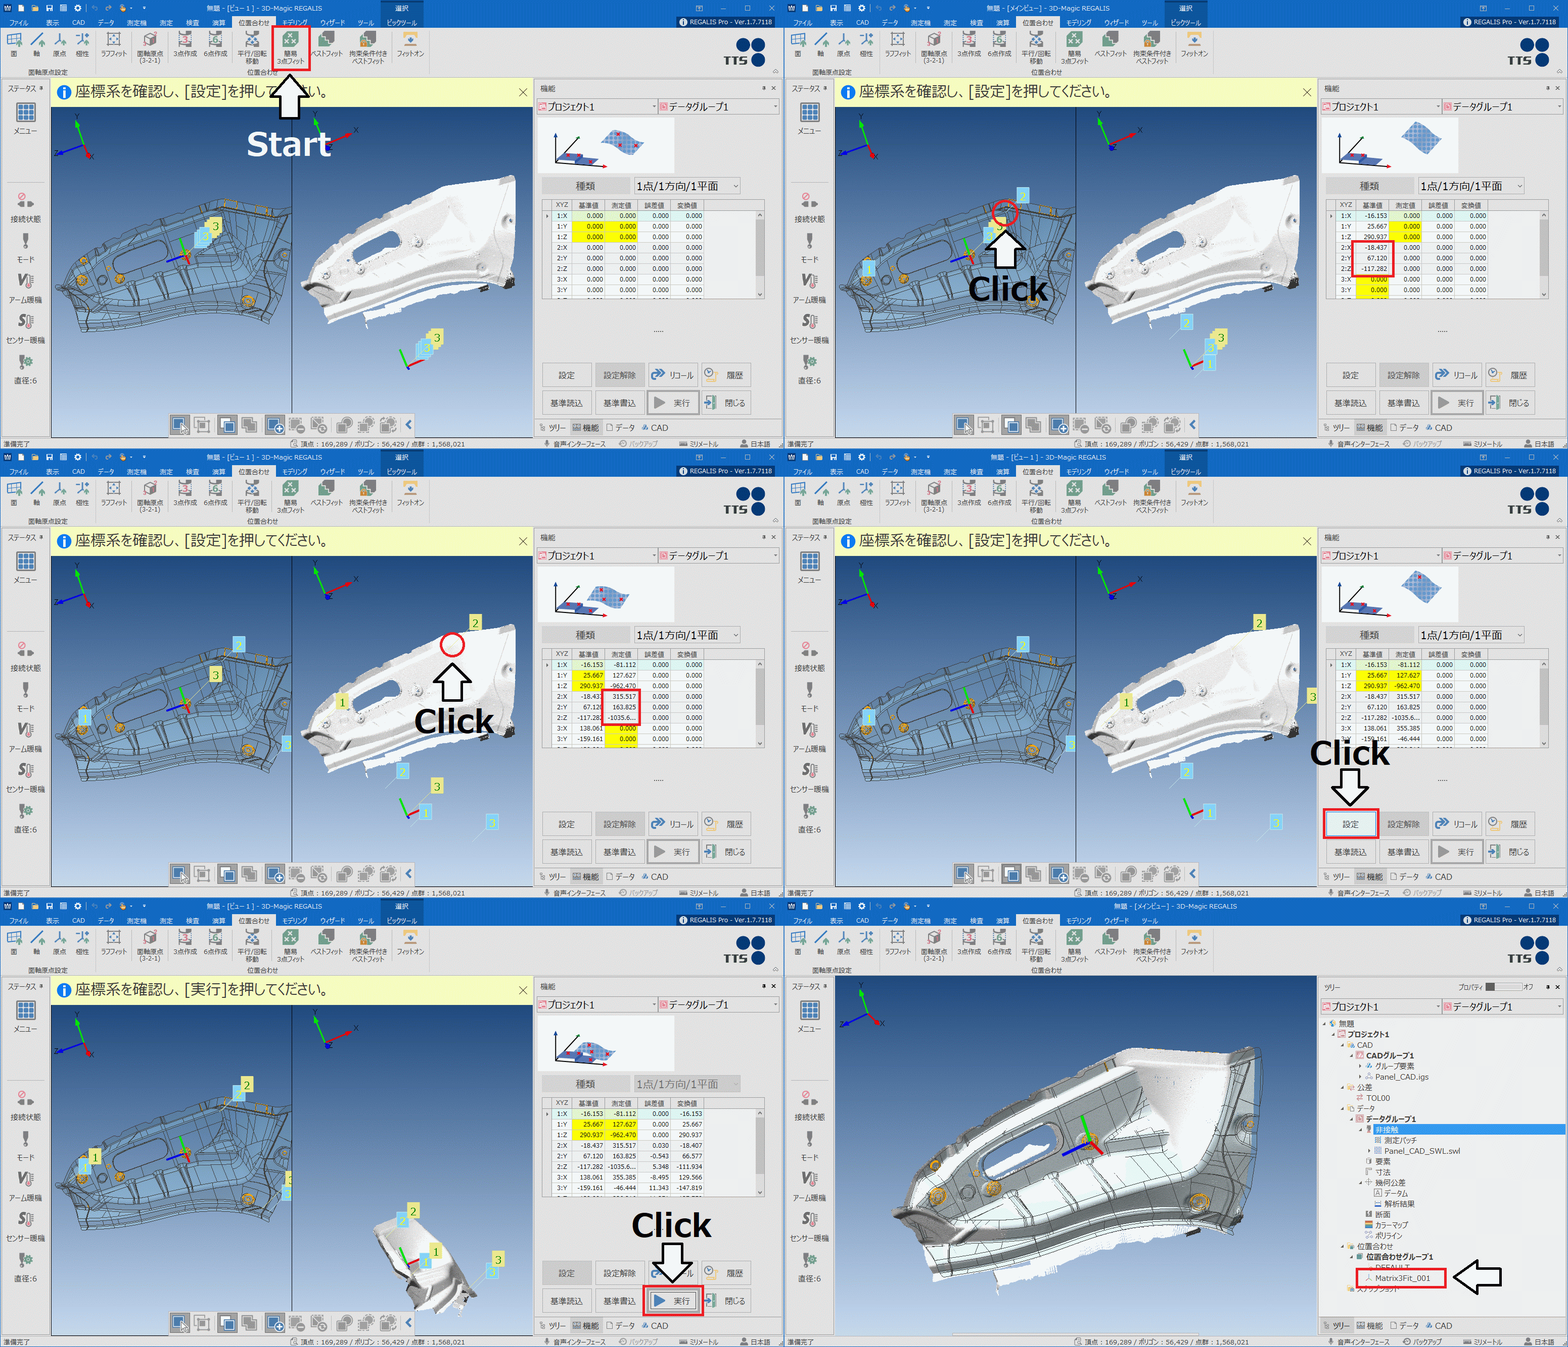
【Simple 3 point fitting】
Pick 3 points from CAD curved surface and point cloud or polygon data to set the position roughly.
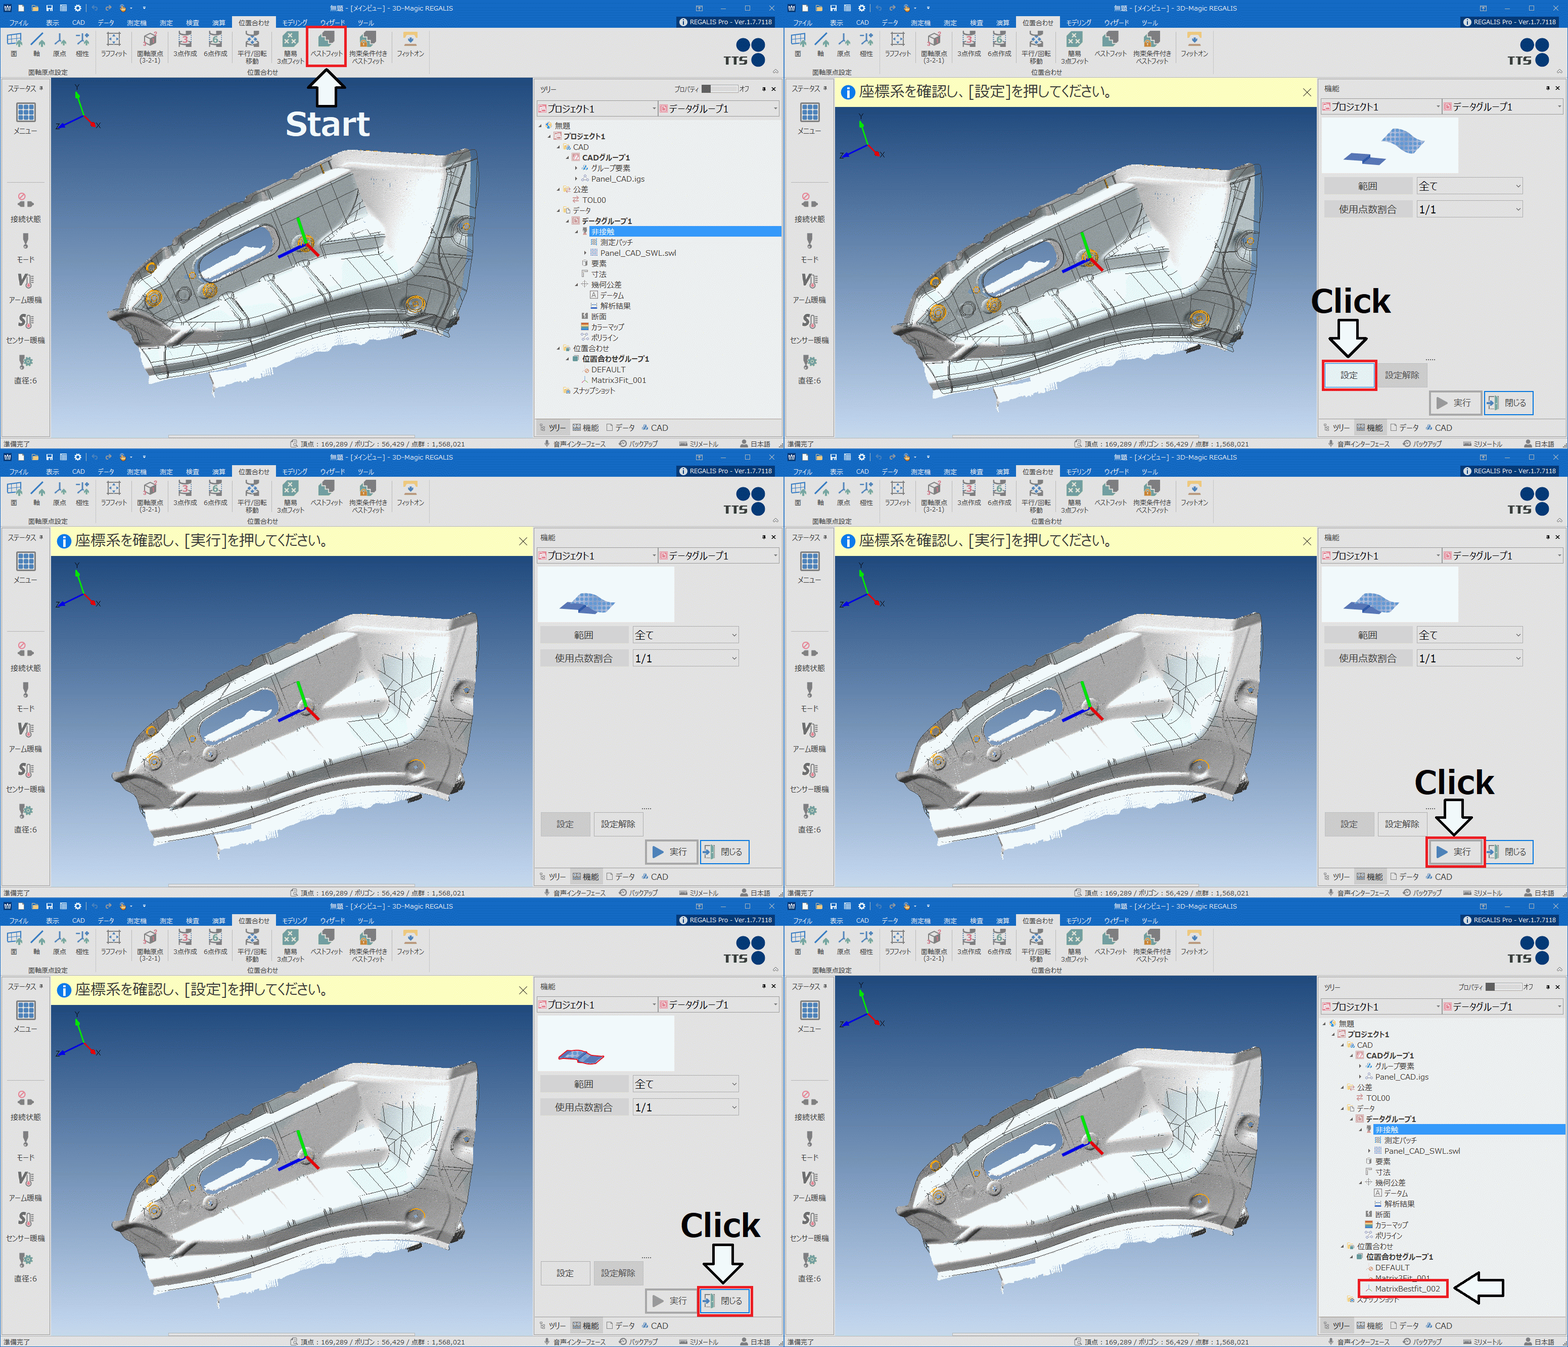
【Best fit】
A function used after the simple 3 point fitting.
Auto-alignment function creates a coordinate system to make the difference between CAD and point cloud minimum.
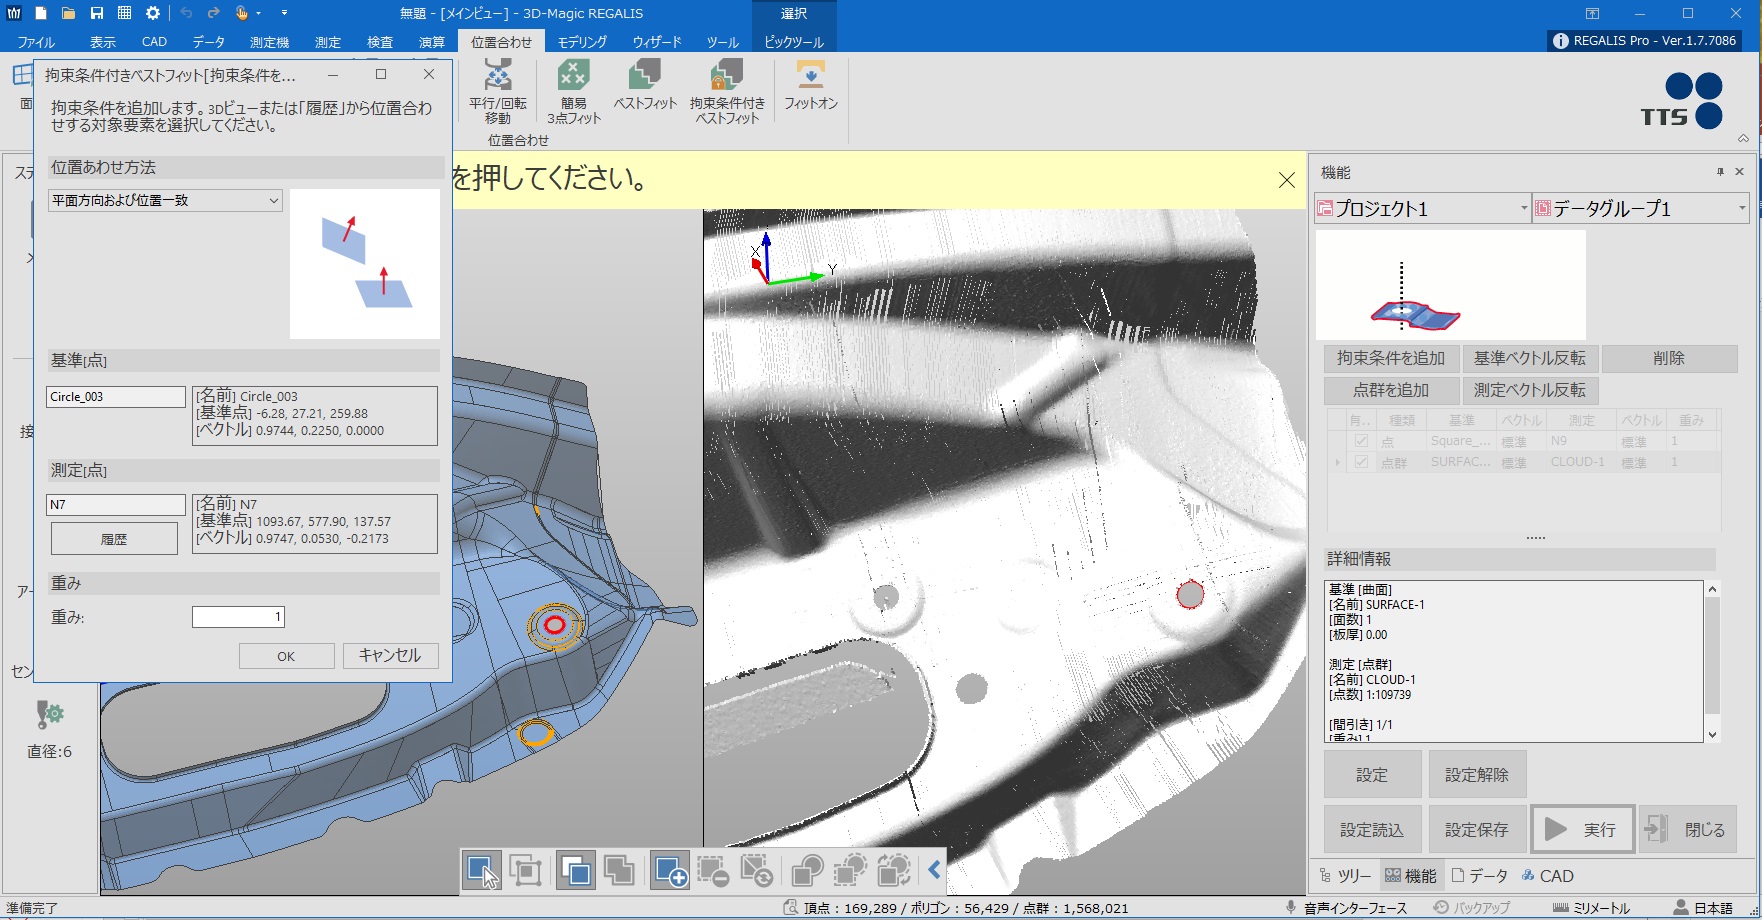
【Best fit with constraints】
For best fit, constrain condition can be added by using the measurement elements.
【Fit on】
Align the mating element without interference.
As alignment is performed at the position where the reference and measurement object first hit, only a positive difference is made.
This is useful when evaluating the clearance by aligning the top and bottom of the mold, or when checking interference by aligning the object and object.
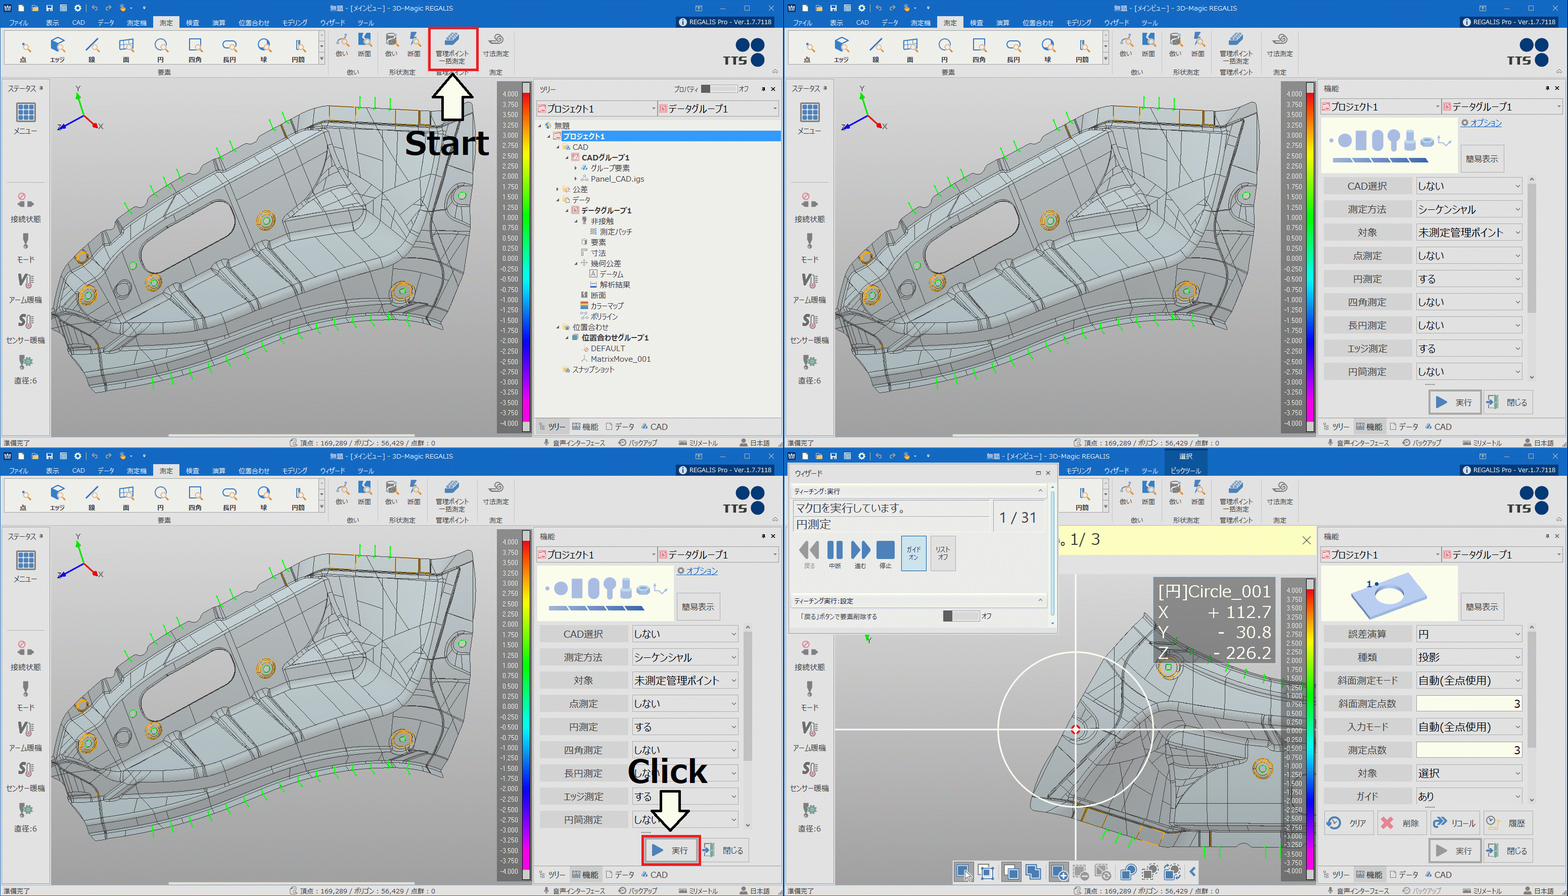
- Elements which require quality control such as points, holes, and edges are registered to CAD data as “management point”.
- It is effective for periodic measurements and measurements with a large number of N, as it can automate the measurement location indication, measurement element name management, analysis work, and report creation by guide measurement.
- Anyone can measure the same part and it prevents measurement omissions.
- Measurement guide information can be created semi-automatically from the measurement work itself.
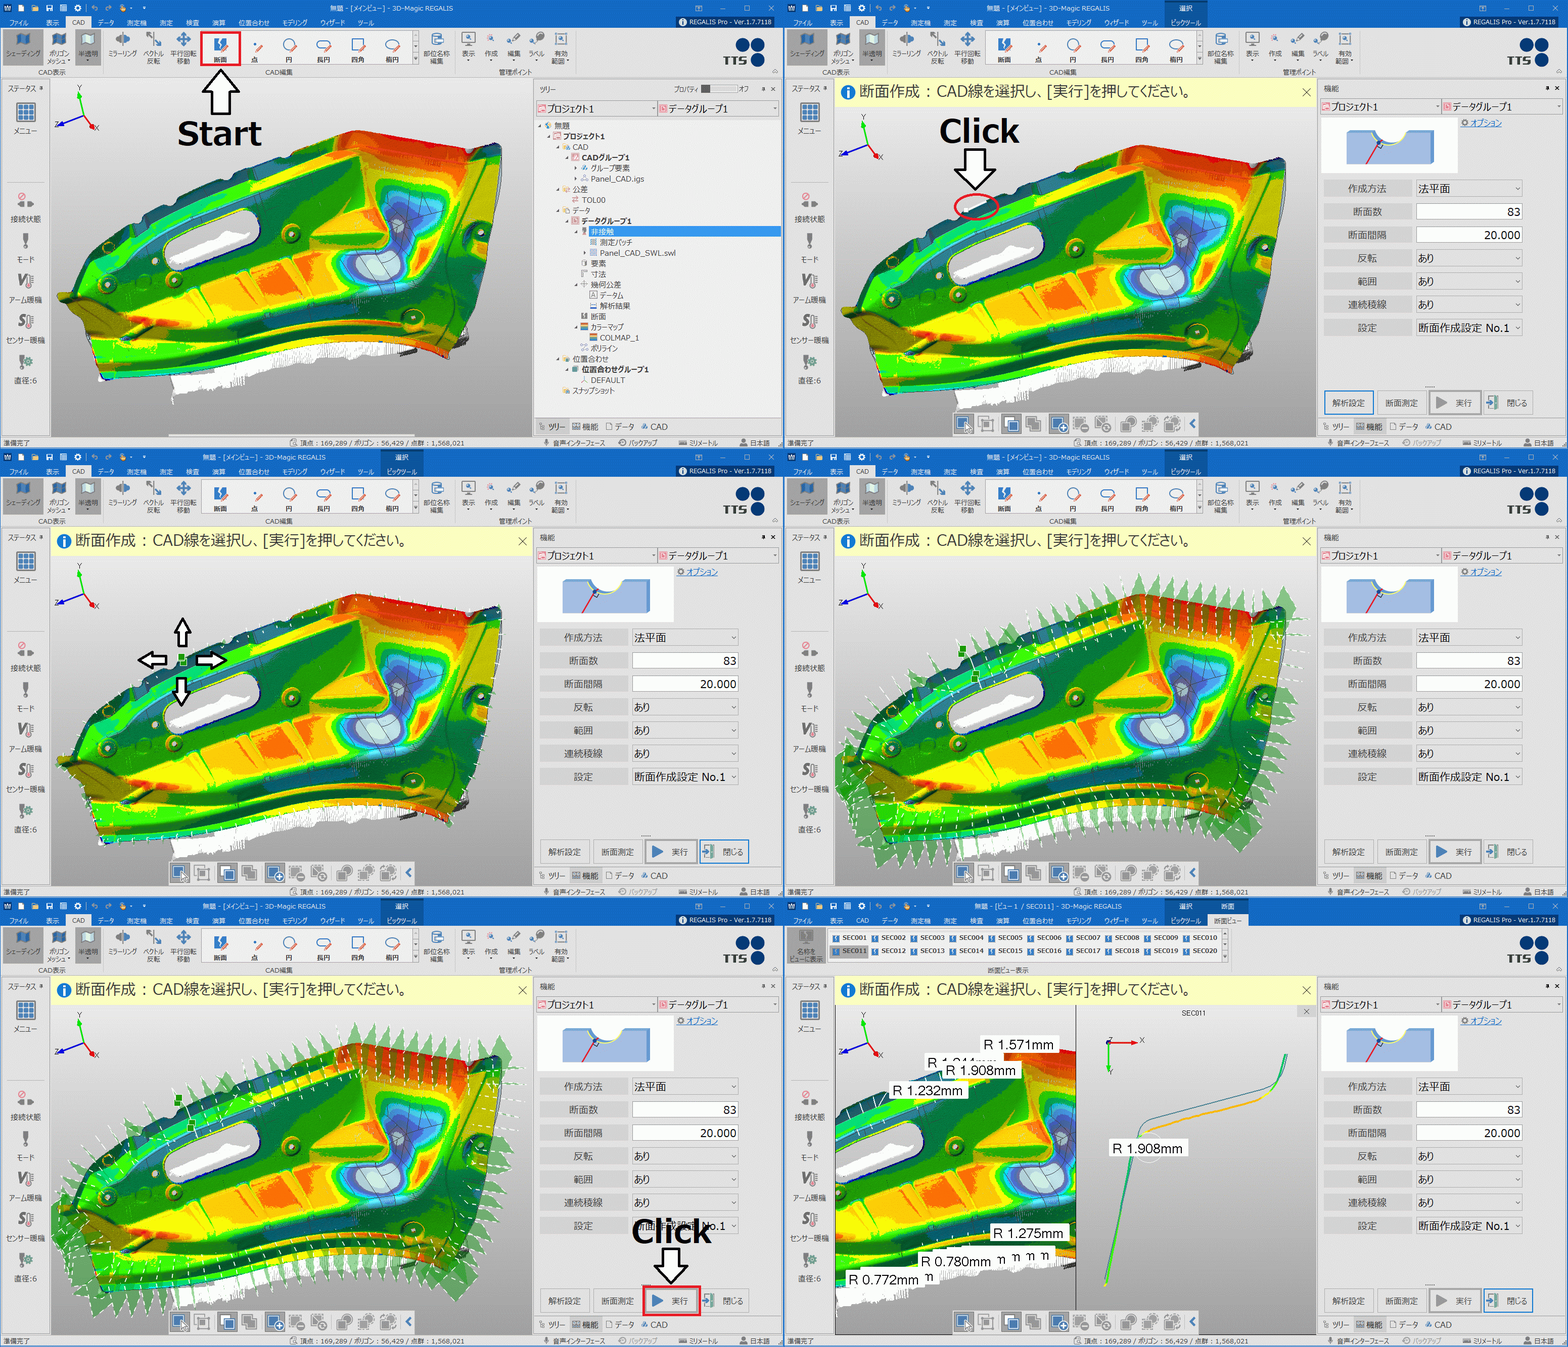
- Create a surface (cross section) where the data and the specified plane intersect, and perform a two-dimensional comparative inspection.
- Specify an inspection range and create a cross section.
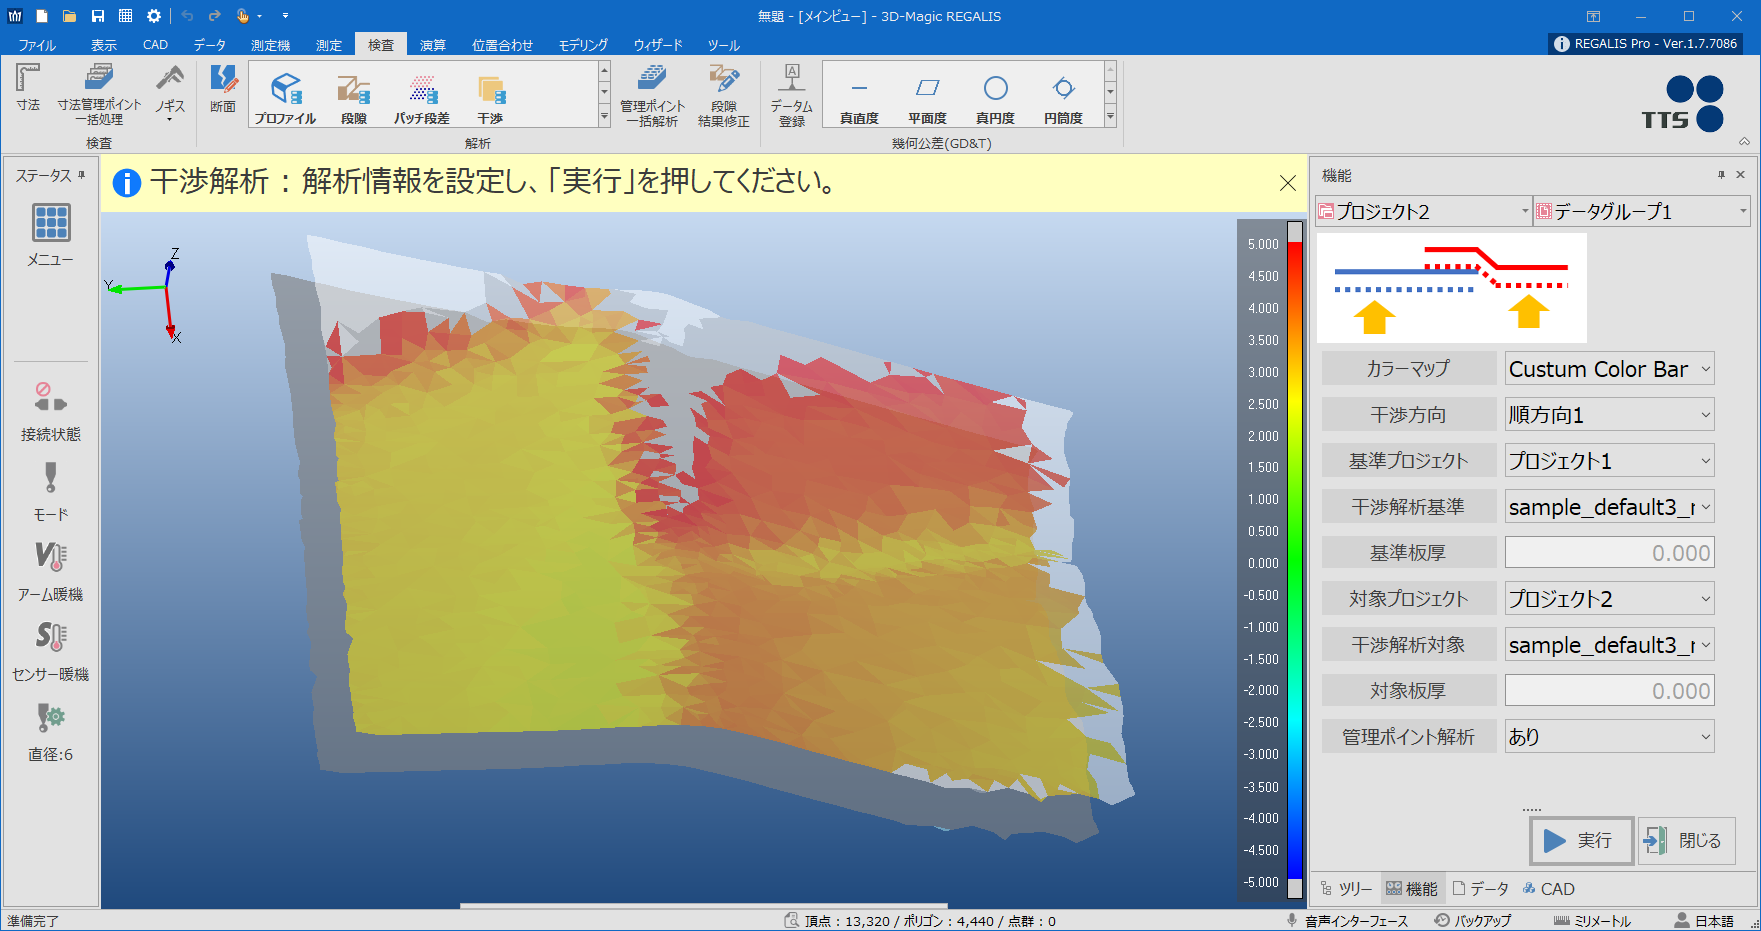
- Verifies the combination accuracy of sheet metal parts.
- Analyzes panels with different project thickness.
- Analyzes gaps (clearance) and interference with the assembly destination (parts) and displays a color map.
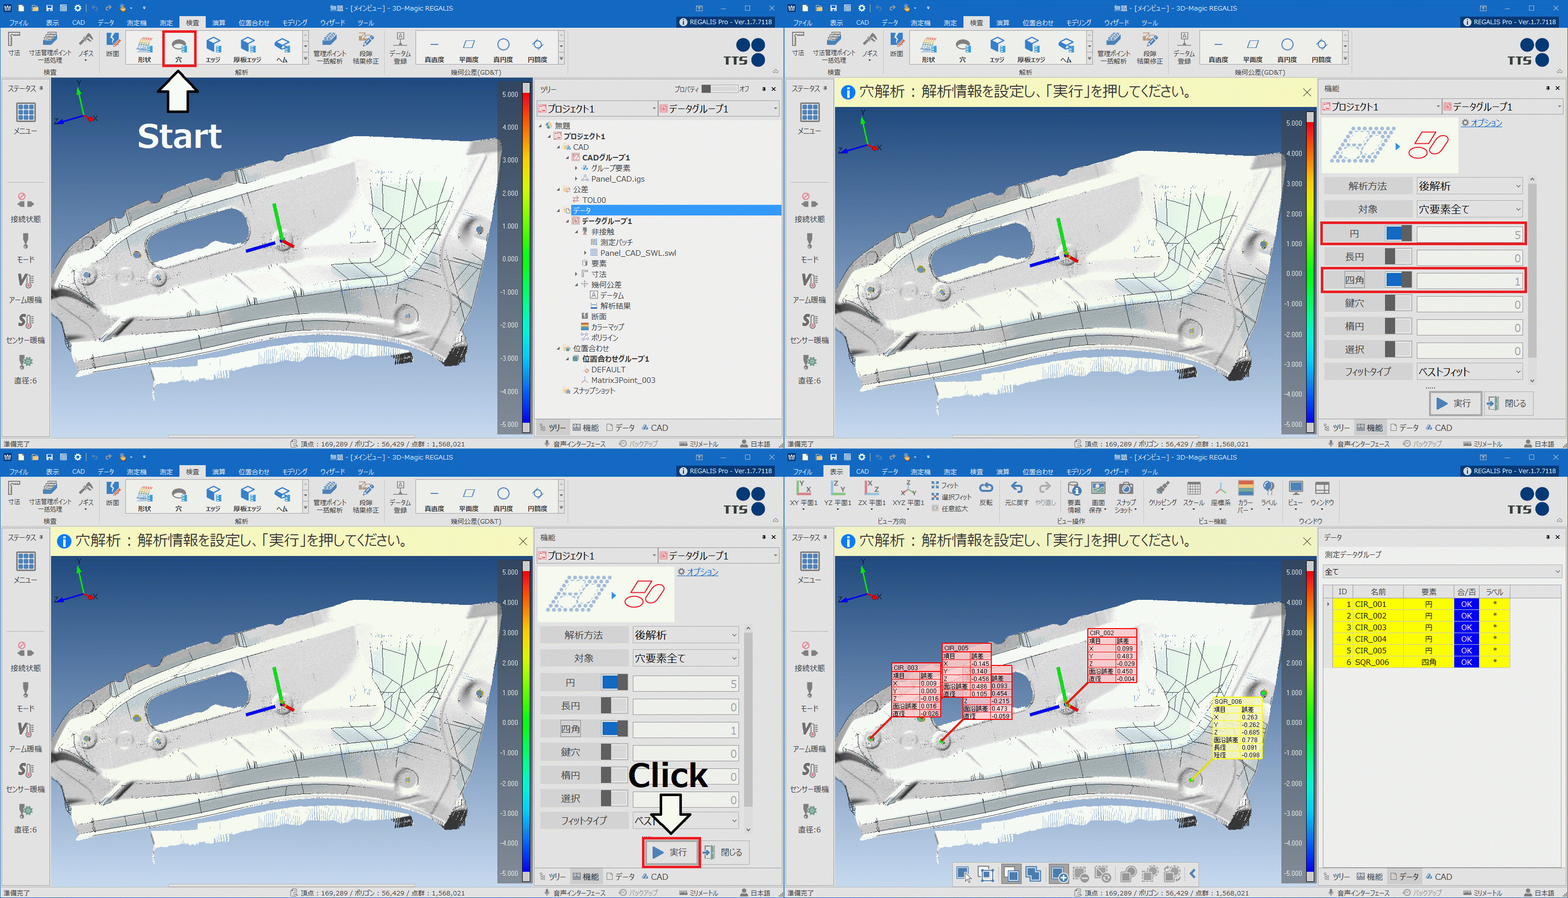
- Recognizes and extracts hole elements automatically by comparing CAD with point cloud.
- It is not necessary to specify each hole when extracting.
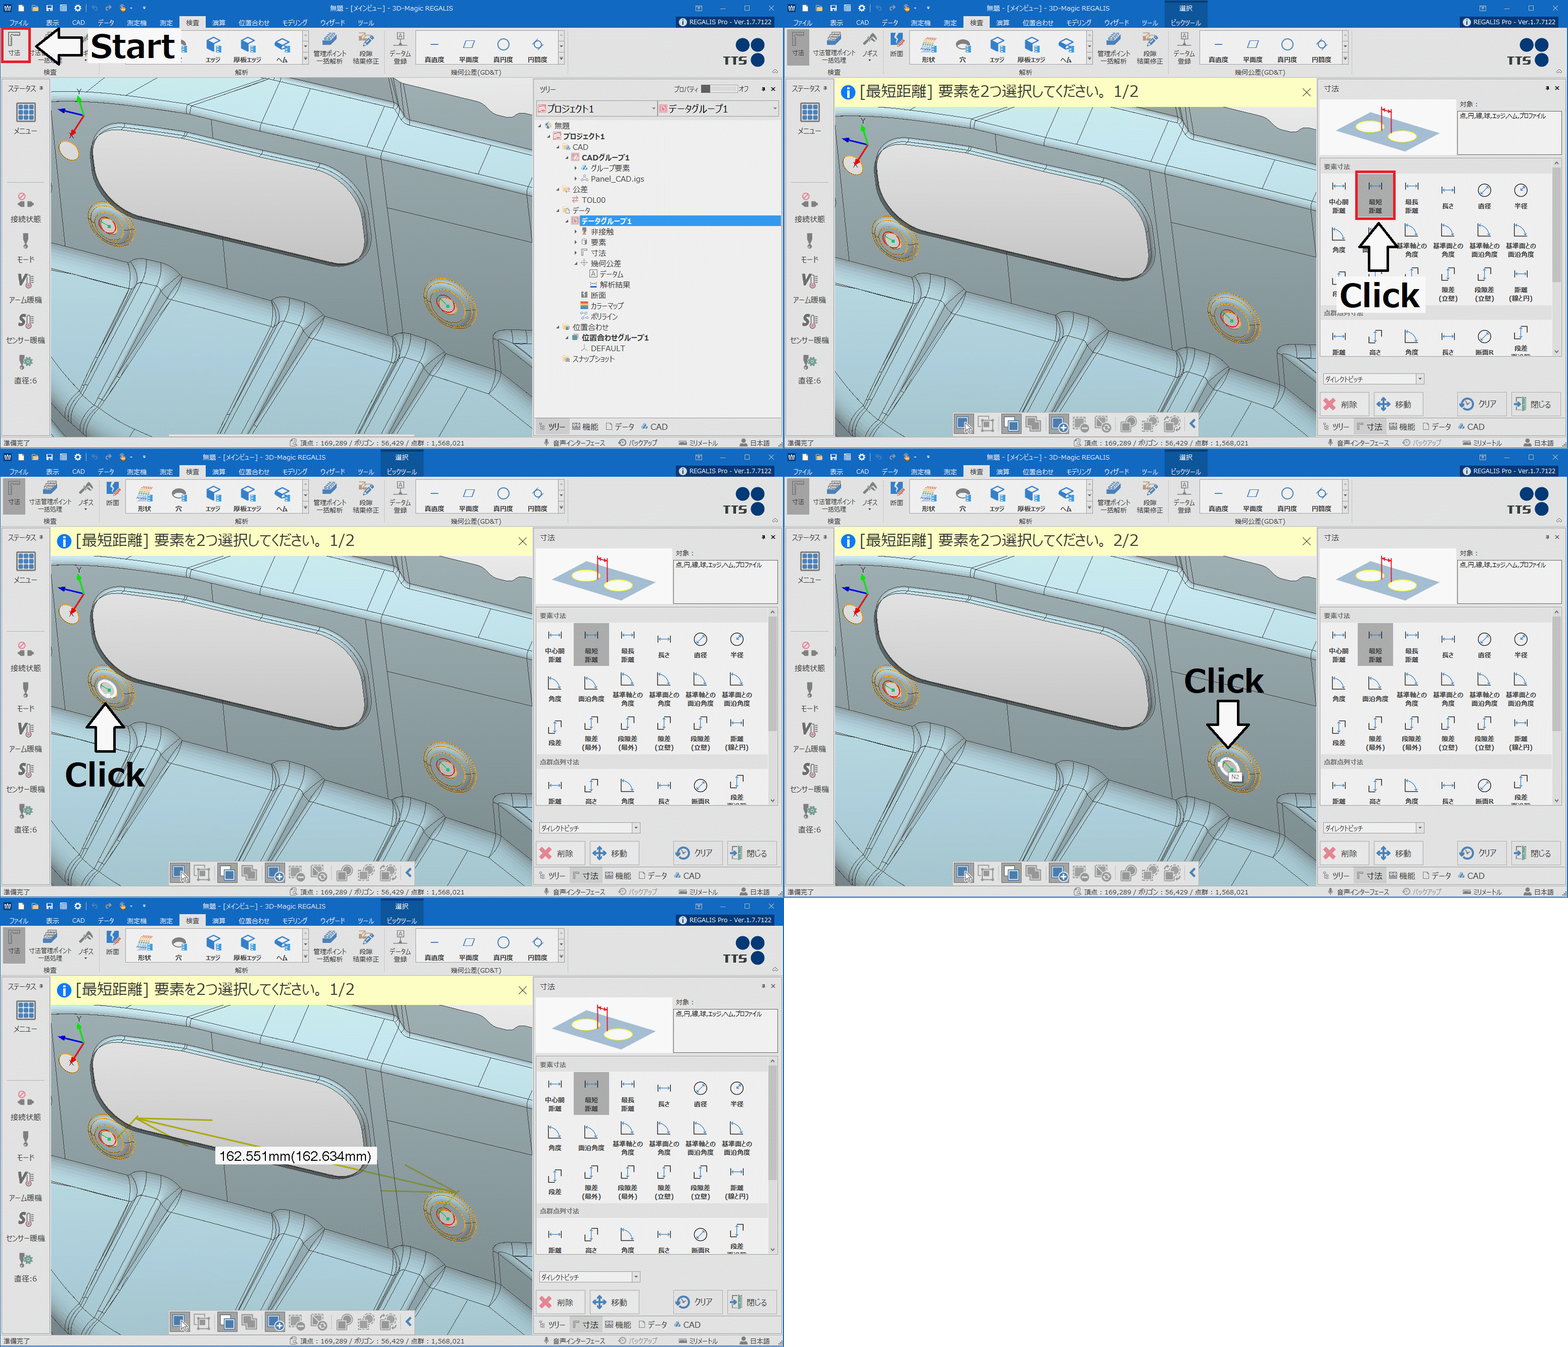
- The dimension can be displayed easily just by picking elements, point cloud, and polygons.
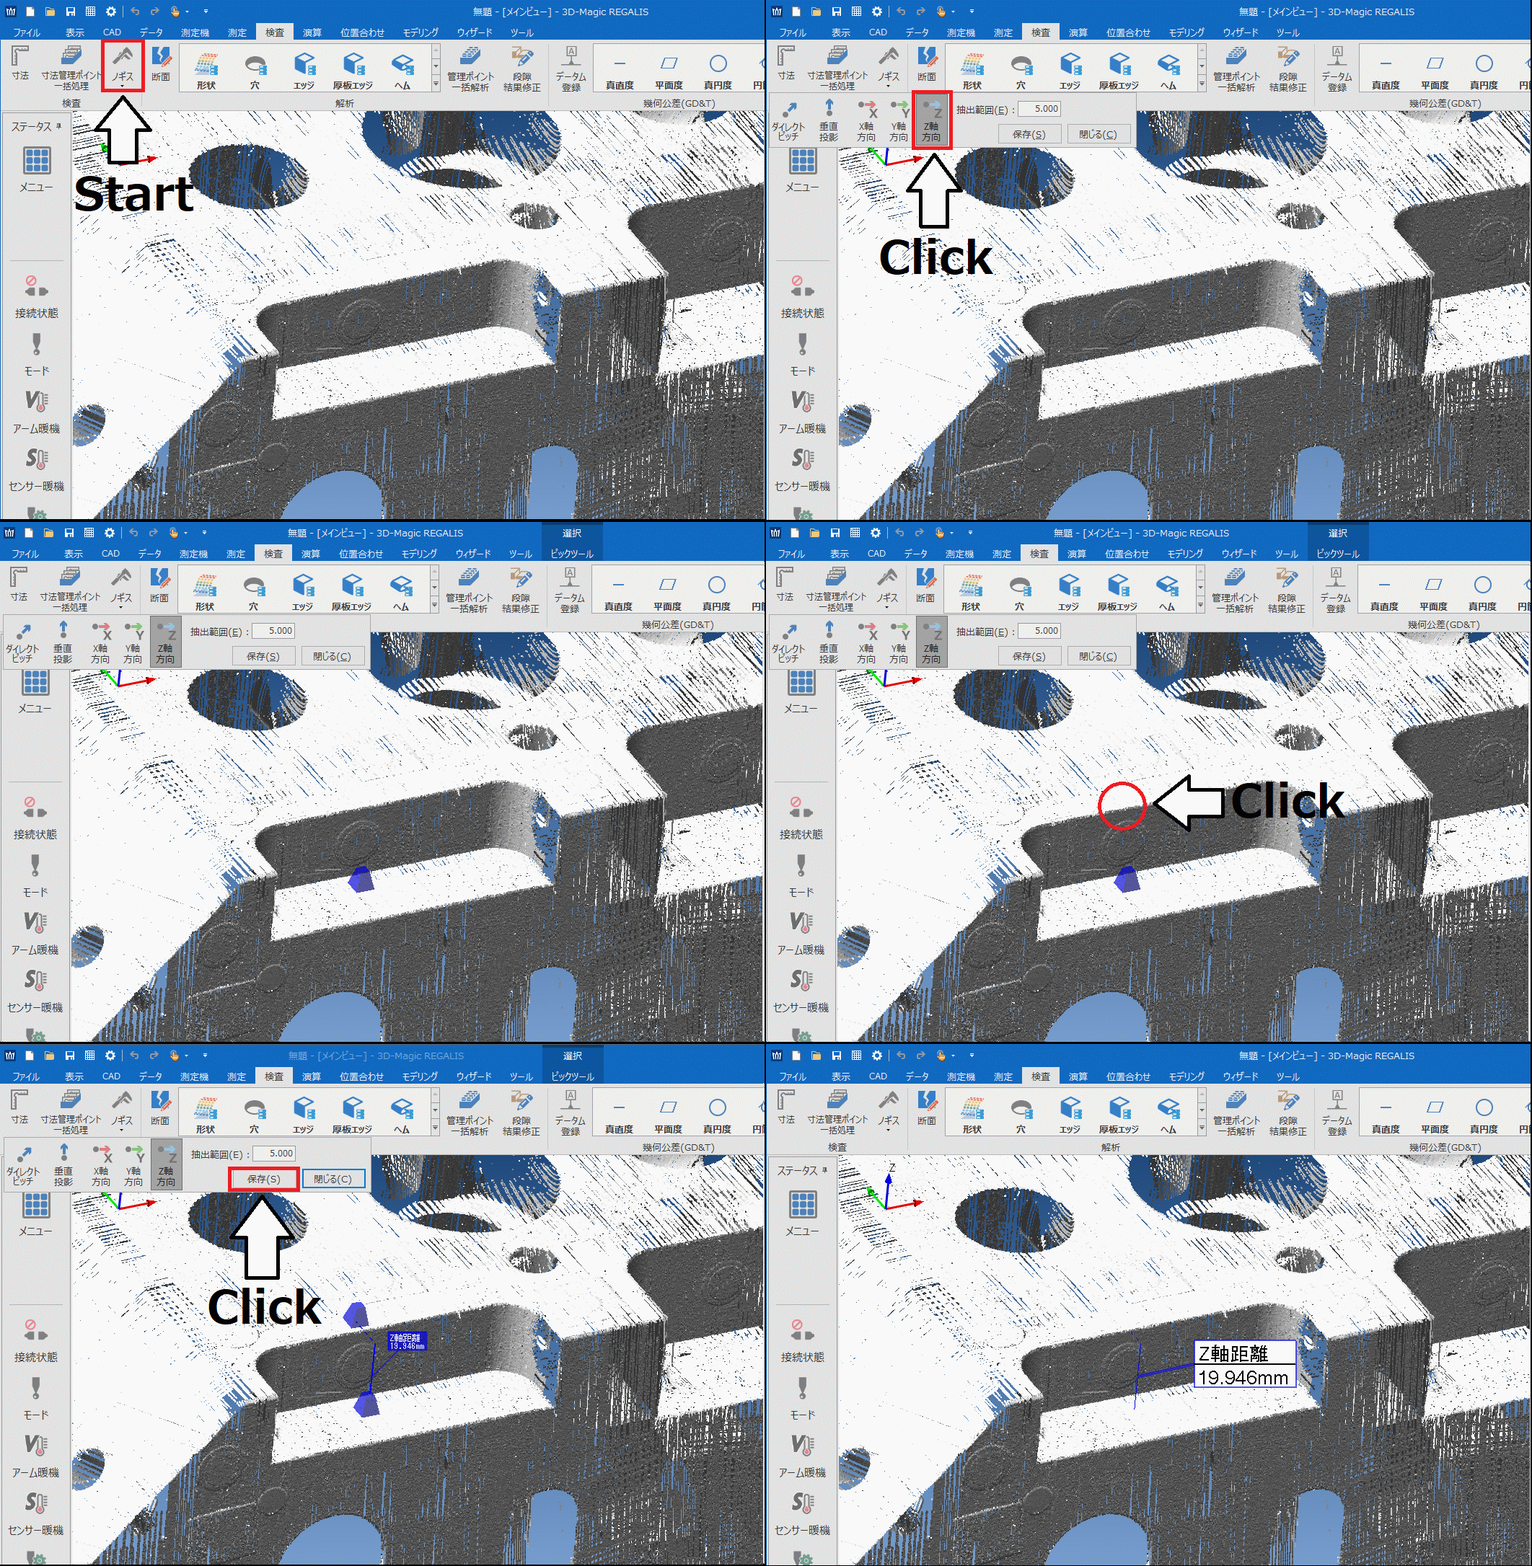
- With the caliper function, axial distance is easily calculated and displayed without cutting the cross section.
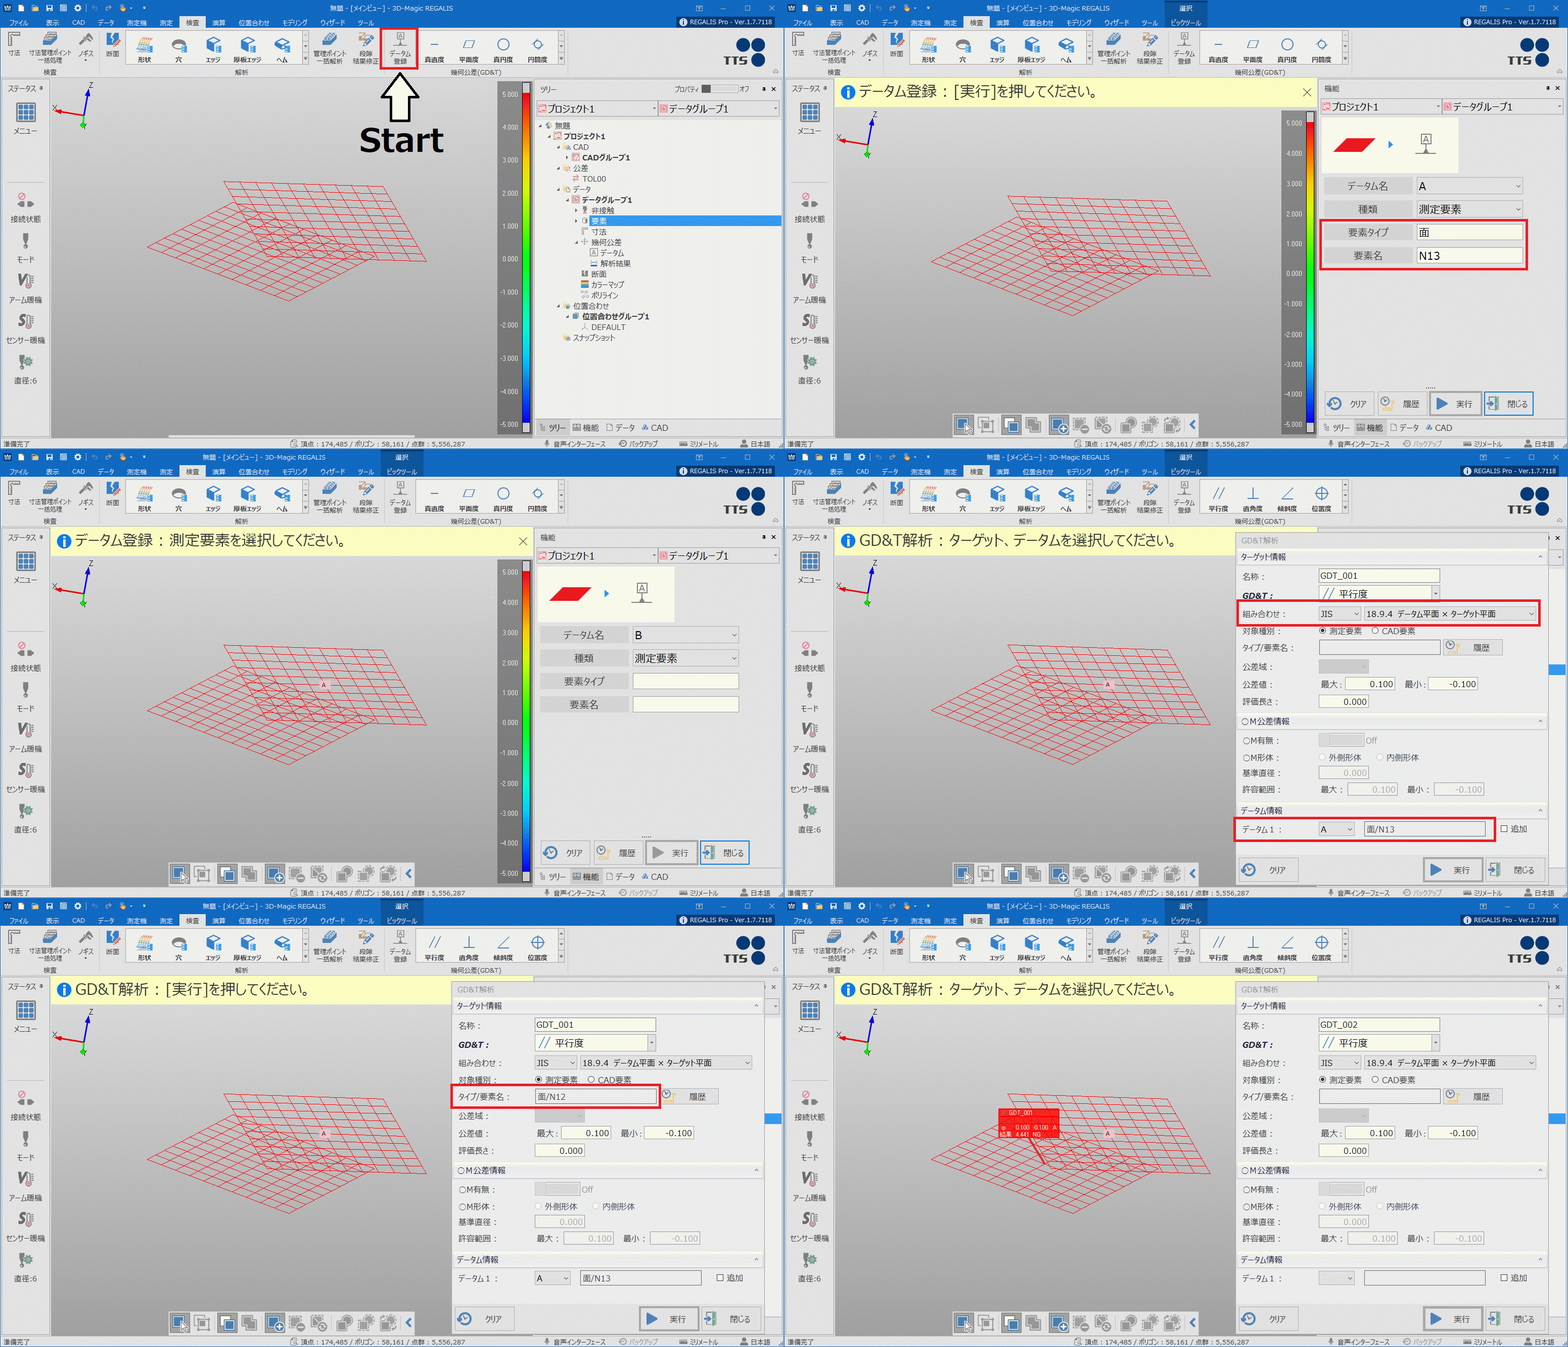
- Calculation result of “Geometrical Dimension and tolerance” is displayed.
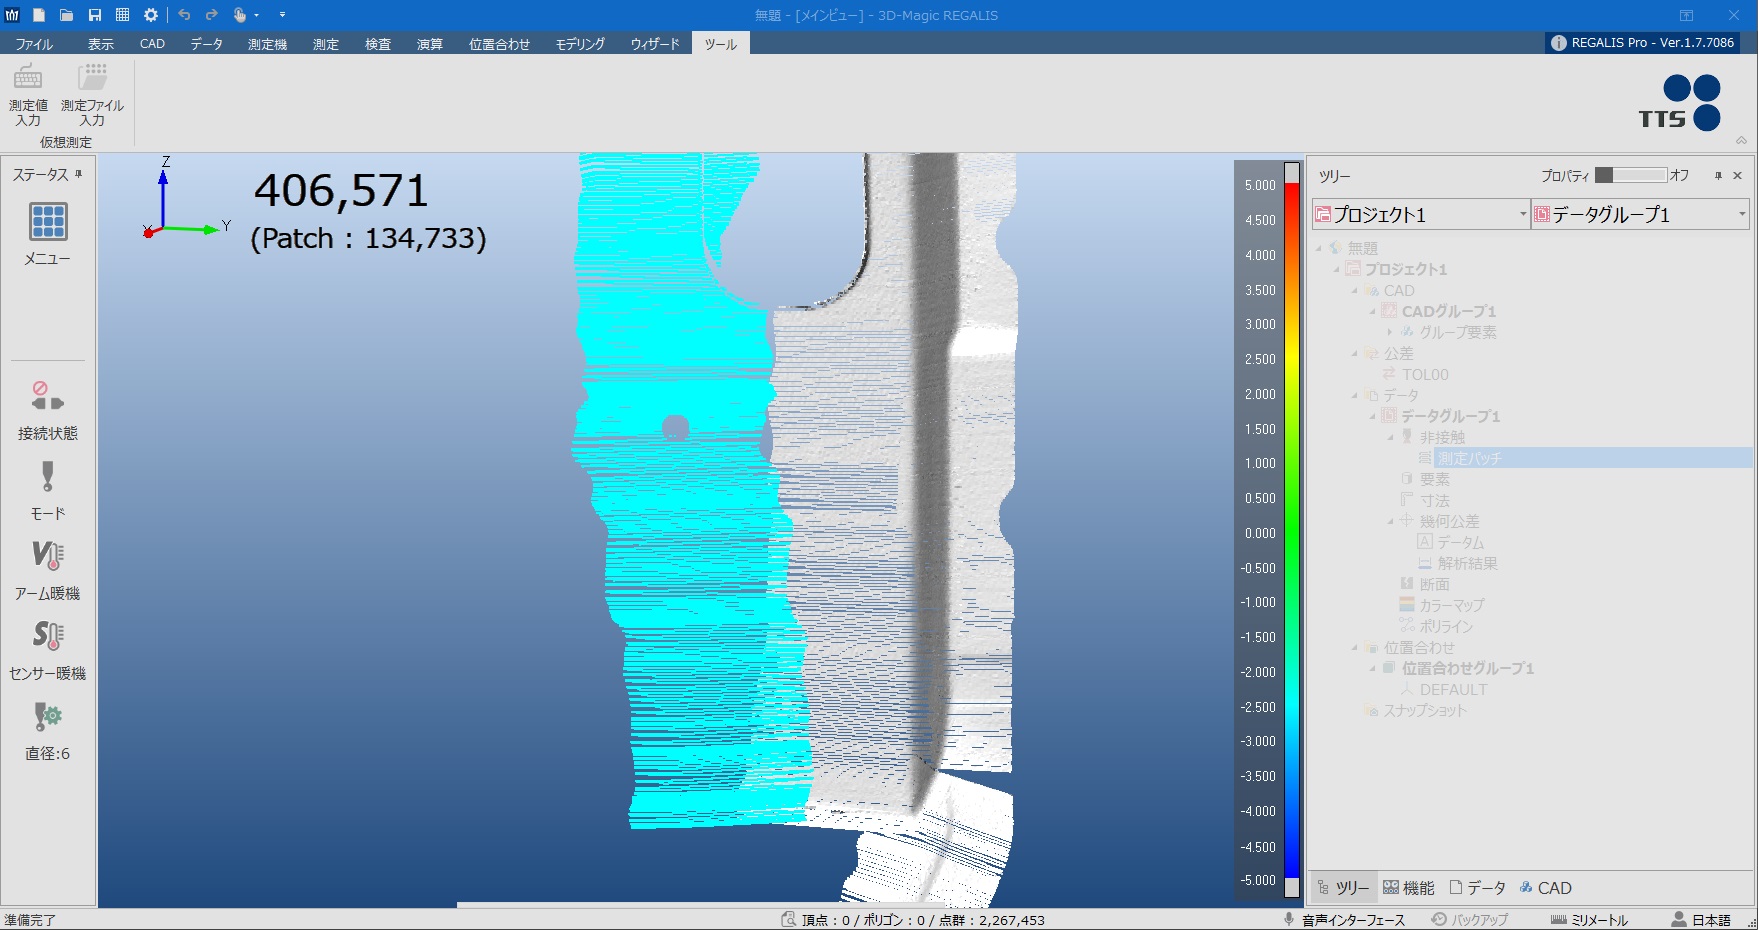
- Polygonizes the point cloud during measurement in real time.
- Polygonizes each patch and merge them all at the end.
- Pick the measurement element (edge, hem, and profile) to find the gap difference.
- Pick point cloud on the cross section to find the gap difference.
- The gap elements can be analyzed at once if they are registered as a management point.
- Analyzes the gap difference between patch files of point cloud.
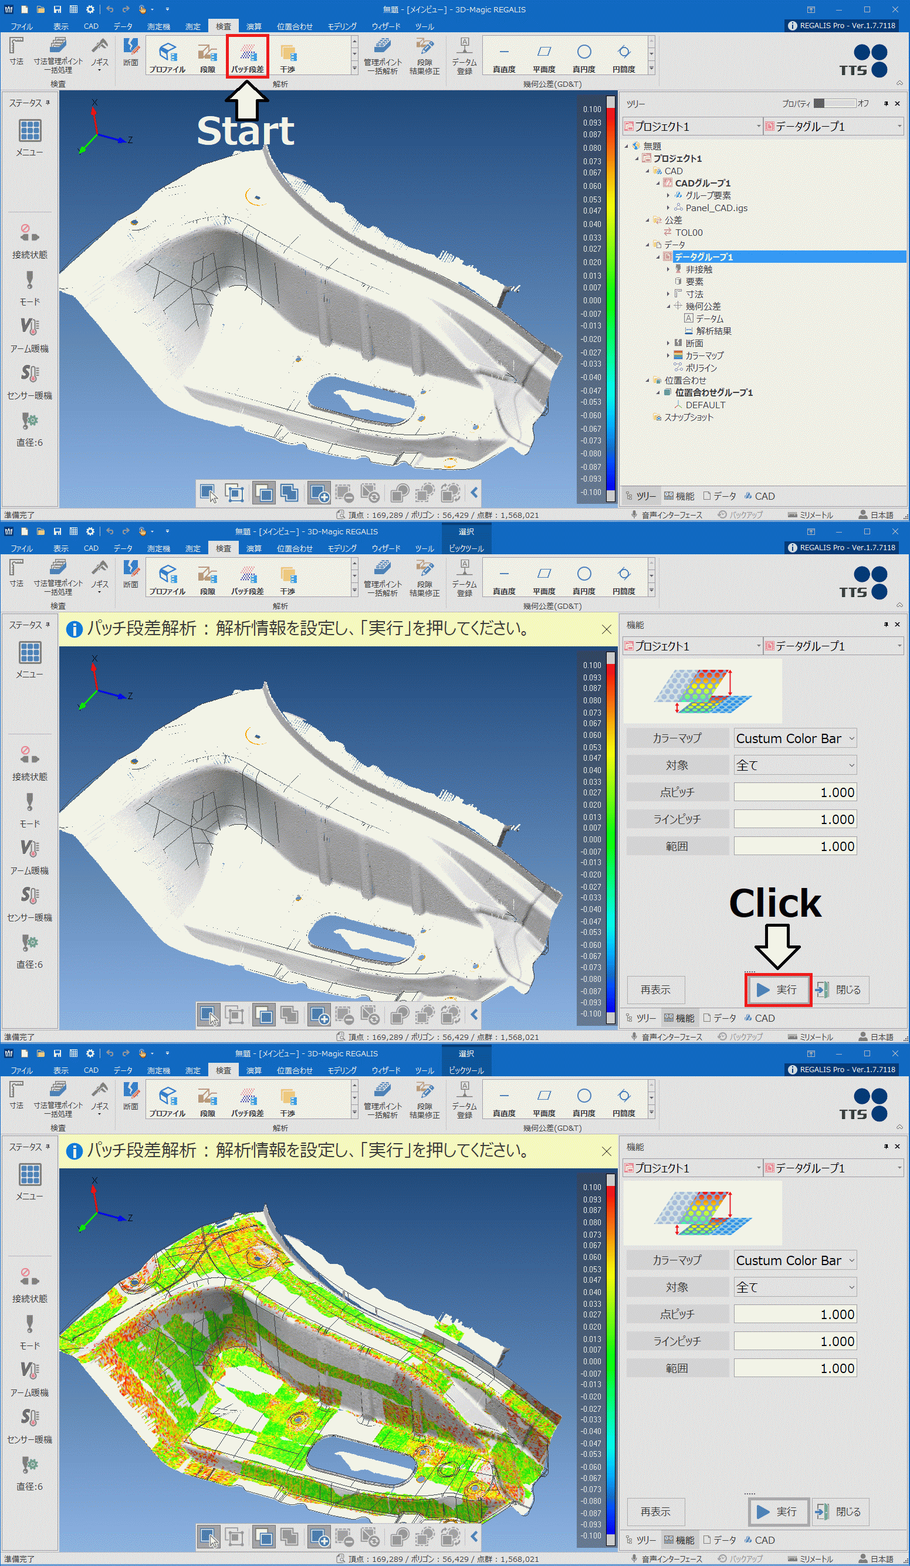
- Creates a measurement procedure (commands are put in order in the workflow) with the wizard and it can be shared among all the bases including overseas bases.
- It can reduce a difference of measurement result which occurs due to a skill and experience of users as position to create a coordinate system and measurement method are controlled on the screen.
- It simplifies the measurement drastically. As a result, the user doesn’t have to go back to his/her PC to control the measurement device. Instead, it can be controlled with buttons on the device, which simplifies and optimizes the measurement widely.
- Report format can be created optionally which allows users to create a report containing only sorted necessary items.
- Process of report creation can be skipped once user’s original format is created and saved as a report is output automatically after the measurement.
**Please do not hesitate to inquire if you have any requests or concerns on report customization.
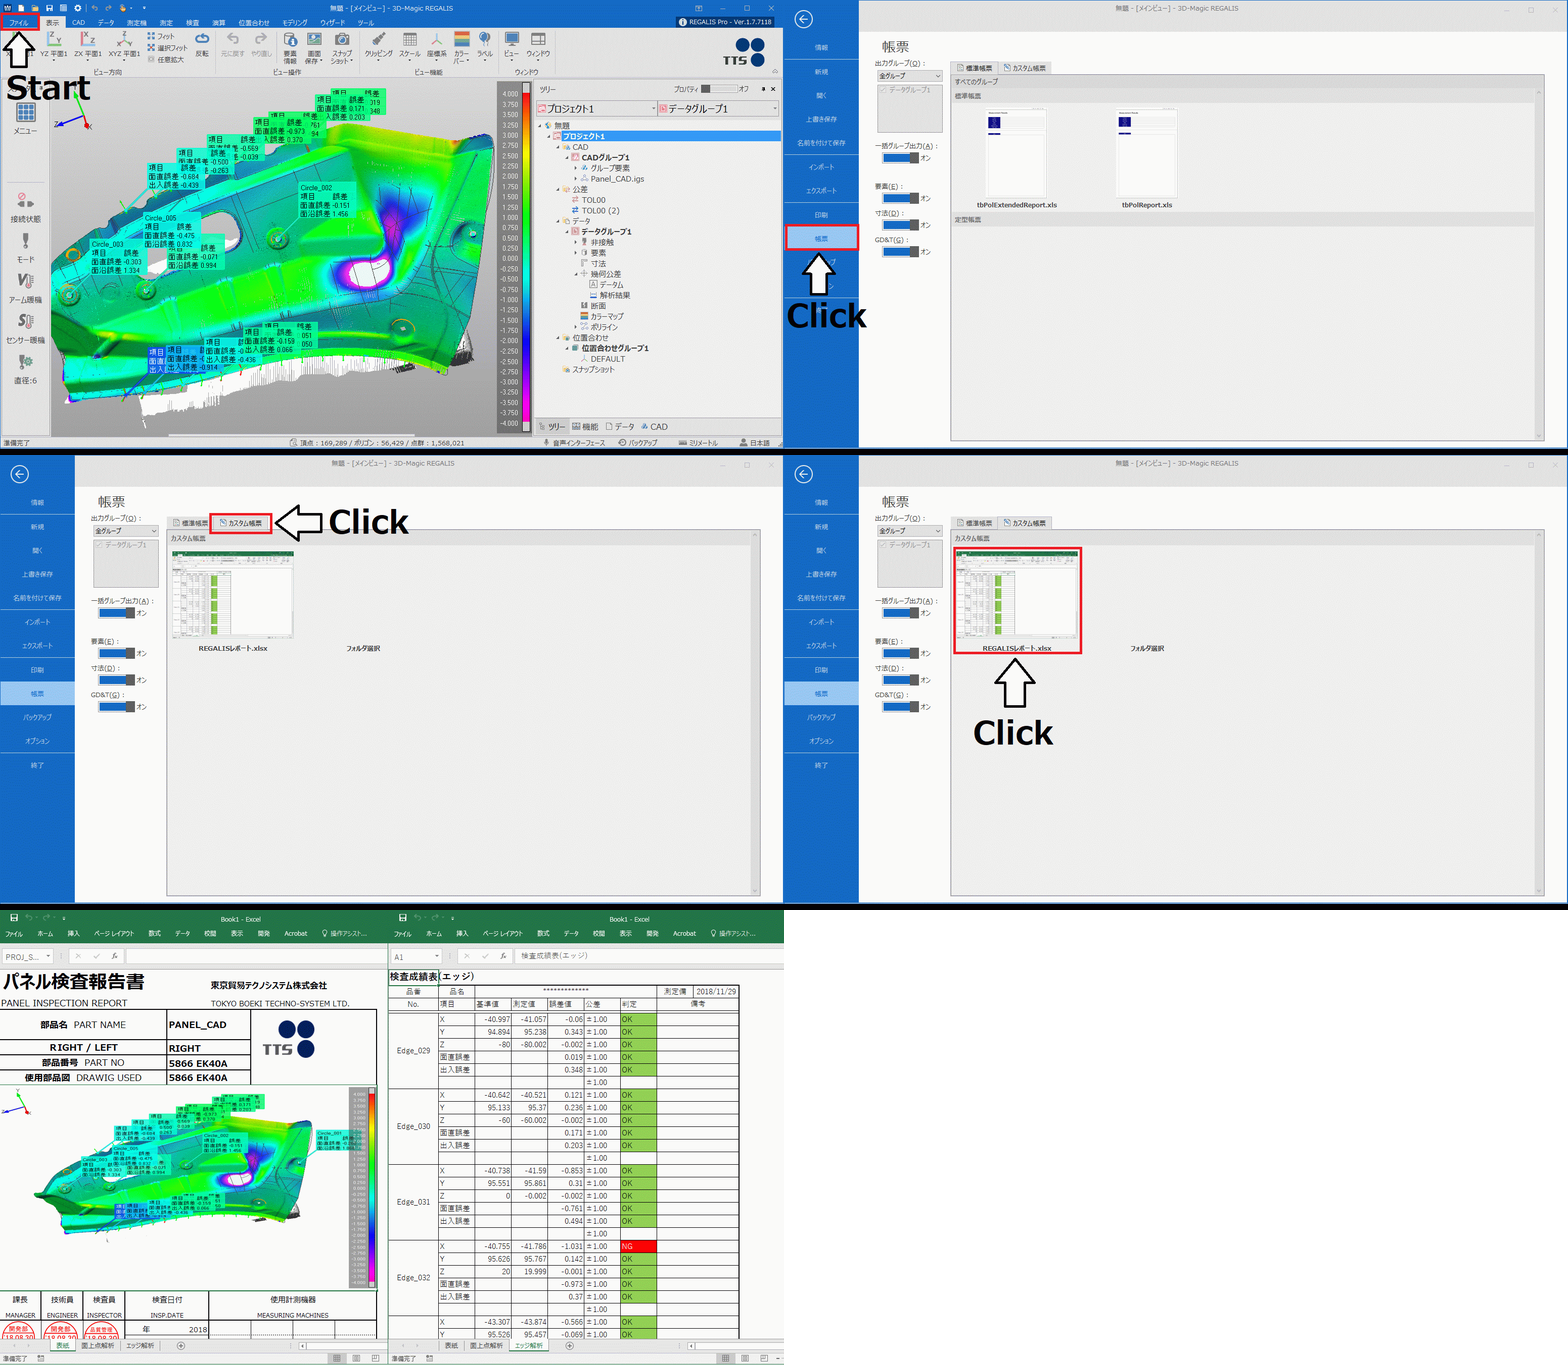
- The viewer version which provides the minimum functions is available.
- This version allows users to install a project file and see the analysis result without interrupting any other works at the site.
Product Specifications
OS
- Microsoft Windows 7 SP1 64bit or higher
- Microsoft Windows 10 version 1703 (Creators Update) 64bit or higher
Japanese/English version Microsoft .NET 4.7 or higher required
Hardware
| Recommended spec | |
|---|---|
| CPU | Intel / AMD quad core |
| Main memory *1 | 32GB |
| HDD free space*1 | 8GB or more |
| Graphics card*2 | NVIDIA Quadro series (On-board graphics memory 8 GB or more) |
| Microsoft Excel | Microsoft Excel 2016 |
*1: Requires hard drive space appropriate to the work load.
*2:Requires the latest graphic card. Please obtain information from the NVIDIA homepage.
There is no guarantee that Intel and AMD manufactured graphics cards will work.
Related Solution
-
<3D-magic REGALIS>Software that anybody can use.
-
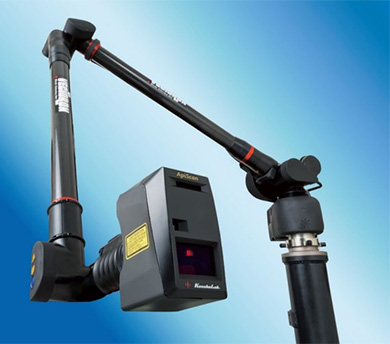
Automation of measurement work, data processing, and report creation by Vectoron


