Leica Laser Tracker
TOKYO TEKKOTSU KYORYO CORPORATION
Reprinted from TechFactory
“Robotic automation is greatly supported by a 3D measurement technology with micron-level accuracy”
Tokyo Boeki Techno-System Ltd. can engineer all the main components of 3D measurement, hardware, software, and system. A non-contact 3D measuring system with Leica Laser Tracker can realize high-accuracy measurement with a level of 150 micrometers even with a large-scale structure of over 20 meters. Utilizing this technology, the positions of robot arms can accurately be controlled, thereby offering an assembly support measuring system (automation application).
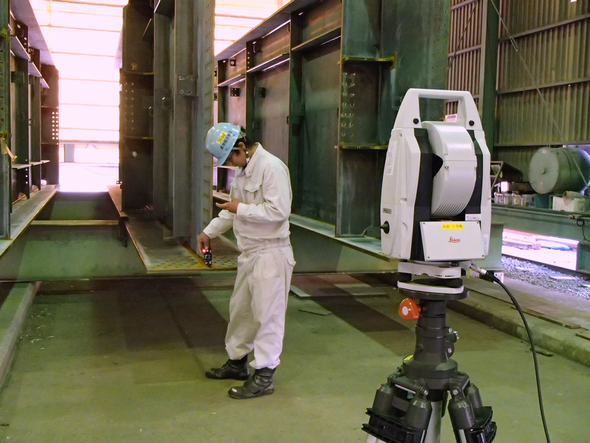
A long-span bridge is made by assembling a number of 12-meter beams. Therefore, it is absolutely necessary that the beams are manufactured with accurate measurement according to the design.
What is the best measuring method for huge beams? The following section introduces the case of Tokyo Tekkotsu Kyoryo Corporation. This company was successful in reduction of measuring costs while increasing the number of beams they can measure per day, by introducing a new method. They describe it as a labor-free solution.
This measuring technique is also useful in automation applications with robots. It can capture accurate positions in real-time; therefore, it helps automation of measurement or assembly operation without involvement of human hands.
It is useful not only in industries where large-scale materials are involved, including airplanes, vehicles, and construction machinery, but also in measurement and assembly of medical equipment.
Tokyo Tekkotsu Kyoryo is a long-established manufacturer that started its operation 102 years ago. It designs and manufactures beams for long-span bridges and steel beams for buildings. With their experience and technology, they were involved in construction of a number of high-profile facilities, including, as examples since 1990, Rainbow Bridge (Tokyo), Meiko Triton (Aichi Prefecture), and Akashi Kaikyo Bridge (Hyogo Prefecture), Yokohama Landmark Tower (Kanagawa Prefecture), Tokyo Big Sight (Tokyo), and Ginza Kabukiza (Tokyo).
For construction of bridges and buildings, supplying parts and structural members that meet specifications on time is their highest priority. Especially in case of bridge members, once they are brought to the site, they cannot be returned to the factory. Therefore, it requires a technology to accurately measure the size in advance.
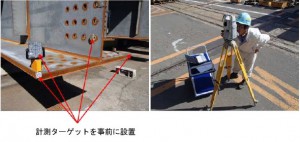
The conventional method which Tokyo Tekkotsu Kyoryo employed was a total station (MONMOS), an optical measuring system. This method uses many sheet-like measurement targets, which reflect light, on an object to be measured (Fig. 1). Each of the targets has on the surface a circle drawn with a cross inside. The measuring system sends an optical wave, records the time until the reflected wave returns, and automatically calculates the distance.
Although they had been using such a measuring technique using an optical measuring system, there were two big issues with the technique: (1) it requires many personnel and the number of beams they could measure per day was small, and (2) if there was any mistake in the measuring procedure, rework was necessary. Since the cost for the conventional technology was high, they decided to go for the development of their own technology that would lead to improving the method.
Development and introduction of Kansoku-kun
As a result of reviewing various measuring technologies, they decided to adopt a laser measuring technology as it matched their factory equipment and measuring conditions. They forged ahead with the development of a new technology, and “Kansoku-kun” was launched in 2013. Kansoku-kun is a solution based on a 3D measuring system, “Leica Laser Tracker AT401,” which Tokyo Boeki Techno-System sells and provides support for. The system has already been used in 21 construction works, and has been showing favorable results in comparison with the conventional technology.
The system has been registered in NETIS (New Technology Information System) by the Ministry of Land, Infrastructure, Transport and Tourism, and the promotion of further use is underway. By introducing Kansoku-kun, they have nearly doubled the capacity of measurable objects per day compared to their previous capacity (Fig. 2). “Among others, the biggest advantage was that I could complete the measuring operation all by myself,” says one of the employees.
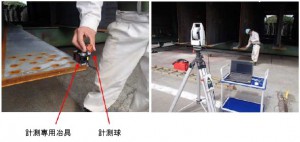
(operating near the object to be measured)
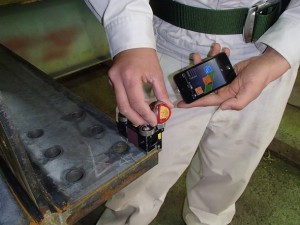
with the terminal at hand
How did they solve the rework issue? The answer was software. They introduced software that immediately reports measurements to its operator. They use PolyWorks, Windows-based software by a Canadian company, InnovMetric Software, to enter and view the measuring results. This software includes a viewer that can run on any terminal with iOS, such as iPhones (Fig. 3).
The viewer shows, for each measuring point according to its X, Y, and Z coordinates, lengths calculated based on drafts, measurements, deviations, and acceptance (Fig.4). Even by checking the acceptance only, you can still immediately tell if there were any measurement mistakes. To view a list of the results of a measuring object, use a laptop computer.
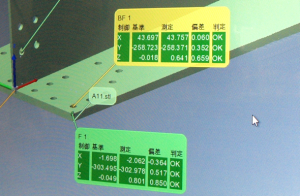
after measurement
Collaborative development of jigs
When they were feeling the limitations of the conventional technology, they considered mainly two technologies for installation. One is a measuring system using a digital camera and the other is a laser 3D measuring system, which is somewhat similar to the one produced by Tokyo Boeki Techno-System. The former has an advantage of low installation cost compared to that of the conventional technology; however, there were two major disadvantages. First, many special markers have to be attached to a beam. To do this, you cannot expect a significant reduction in the time of measuring processes. The other disadvantage is that you need to perform measurement away from a beam to be measured for a certain distance or more. “We couldn’t prepare a space that is big enough to conduct the digital camera-based measurement in our measuring building. With the technology using a digital camera, we couldn’t handle multiple beams side by side for measurement (Fig. 5),” says one of the employees.

side by side(measuring with Kansoku-kun).
For the installation of a laser 3D measuring system, the reason for them to choose Tokyo Boeki Techno-System from among several candidates was that the company offered cooperation in the development of measuring equipment. *1)
*1) With a manufacturer division, Tokyo Boeki Techno-System can support such development. The company has obtained a level-2 certification from Swiss Leica Geosystems, which makes it able to offer services of equipment’s replacement, repair, and calibration.
First, they needed a specialized jig for measurement. For example, if you want to determine the coordinate of an intersection of three faces (such as the vertex of a cube), you need to measure three times to determine one of the faces, and therefore a total of nine times of measurements will be needed. By using specialized jigs, you can reduce the number to three times.
“We gave them specifications and requests for a jig we wanted, and Tokyo Boeki Techno-System completed a finished product in one to two months.” (Tokyo Tekkotsu Kyoryo)
Kansoku-kun system measures a distance by emitting a laser from the main body (Leica Laser Tracker) and reflecting it with a spherical object, called a “reflector.” As each reflector has three mirrors positioned at a 90-degree angle to each other inside, it can reflect a light from any direction back to its incident direction. Since each reflector has an accurately-specified diameter, by placing a reflector on a measuring point you can calculate relative coordinates from the main body (tracker).
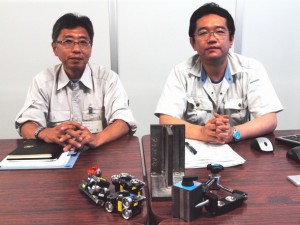
Four kinds of jigs were prepared for different measuring positions on a beam (Fig. 6). Three of them each have three dents for placing a reflector, so measurement will be completed by simply placing reflectors on the dents. The reason for having three kinds is that the shape of the jig needs to be changed depending on the location of the beam to be measured. Even when the corner of a beam is chamfered, you can acquire an accurate coordinate using the jigs.
The fourth kind adopts an arm shape with two joints as it is used for coordinate measurement for places on which a jig cannot be directly placed, such as an undersurface.
“We asked Tokyo Boeki Techno-System to develop not only the jigs but also the macros that are necessary for entering the measuring results into PolyWorks.” (Tokyo Tekkotsu Kyoryo)
“By developing the jigs and various macros, we have not only improved our operational efficiency but also registered it with NETIS of the Ministry of Land, Infrastructure, Transport and Tourism as a new technology, largely contributing to an increase in our incoming orders.”(Tokyo Tekkotsu Kyoryo)
Tokyo Tekkotsu Kyoryo Corporation
(current company name: FaB-Tec Japan Corporation)
Since the foundation in August, 1914, as a manufacturer specialized in steel beams and bridge components, the company has been providing high-quality steel beams and conducting manufacturing and installation of various types of bridges, contributing to people’s lives. During the era of high economic growth, it was in charge of numerous construction works that support the foundations of transportation infrastructure, such as high-rise buildings and expressway networks. It was also engaged in large-scale projects, where it utilized its advanced technology to provide many of Japan’s major steel structures and bridges, such as Tokyo Metropolitan Government buildings, Yokohama Landmark Tower, Akashi Kaikyo Bridge, and Rainbow Bridge. In recent years, it has continued to record various achievements, including Tokyo Olympics-related construction and large-scale construction of urban expressways and railway networks, in both the public and private spheres.
Product used in this case study
Leica Laser Tracker


